

Windmill Modelling 風車のモデル作成
by David on 2009-11-30 (Mon) 11:39AM|
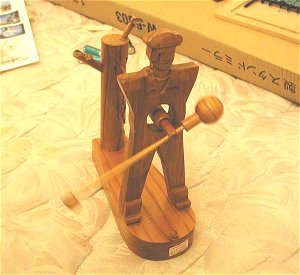
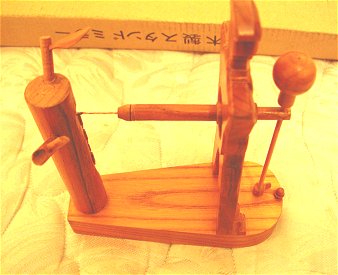
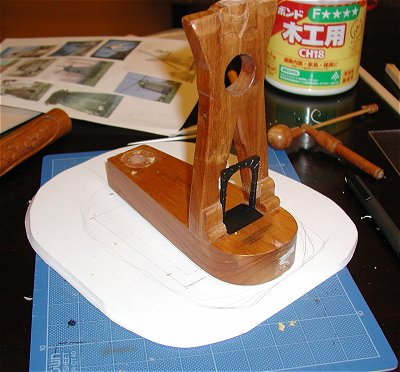
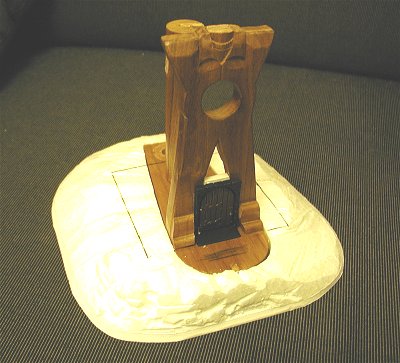
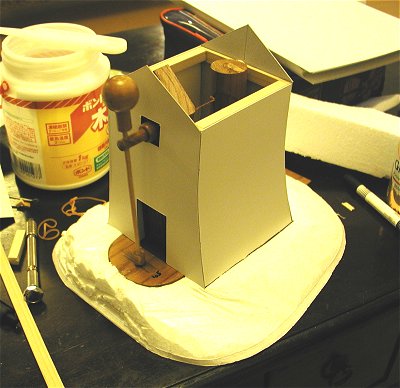
I saw this great wooden ornament on sale in a local shop for only 200yen (2 dollars), and I loved the idea of converting it into a windmill. The reason being that if you look closely at the horizontal bar going through the centre of the golfer's chest, you'll notice that it doesn't actually touch the edges of the hole. There is (I assume) a number of magnets ringing the hole, and there is also one in the center of the bar. Instead of attracting the bar, the surrounding magnets have been reversed to repel the center bar. Normally this would just make it shoot out to one side, but the orange thread tying it to the back post holds it there - the magnets try to repel the bar out towards the front, but the thread keeps it pulled back. What this does is remove almost all friction, so the well balanced golf club just swings and swings and swings. For a windmill, this just wouldn't stop moving one way or the other (pushed gently by wind currents). First, I chopped off the poor guy's head, and removed the back post. I wanted to move it 3cm forwards to make a smaller building. I found an old castle door (Dungeonbowl, I think), which fitted neatly between the legs. You can see the square outline of the building on the base. Next I wanted to build up the surrounding base to make the building sit on top of a small hill - it is a windmill, after all. I added a small rocky cliff to the center and left of the door, to stop the model looking too symmetrical. The wooden square glued to the top of the model will be the frame for the top of the walls. I also stuck wood strips to the bottom of the structure, because I wanted to curve the walls slightly, and without frames at top and bottom that wouldn't be very easy. I also cut the guy's shoulders off to allow for the slanting roof. I don't think he'll be playing golf again anytime soon! The walls were tricky. The front was adding first, and is just straight vertical, but the other three walls are curve slightly to bend outwards towards the base. It just seemed to make it look a little more organic and less boxy.
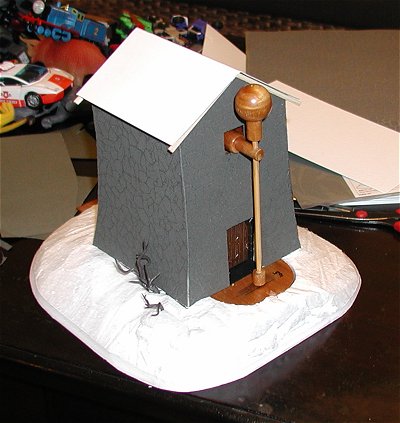
I stuck a few plastic branches into the base on one side, just to add to the realism of the rocky slope there. Then I stuck on stone-textured paper (from Tamiya) one wall at a time, and carefull trimmed each corner off with a sharp knife. The roof also went on - a simple inverted V of card, with some card supports glued to the underside to keep the shape.
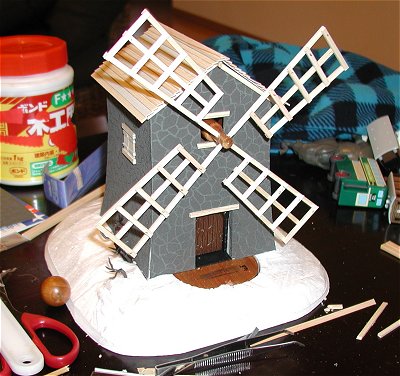
The wood goes on! Some wood beams on the front, and a small shuttered window on each wall. I decided to use wood for the roof, rather than slate or tiles, because I thought that it might suggest the walls have stood for generations, replacing inner working and roofing as it fell apart. Plus it wouldn't mean grey walls and grey roof! :) Finally, I snapped off the golf club and made 4 identical sails. They only clear the ground by a few millimetres, so anybody going through the door had better move fast! You can't see well in this photo, but each sail was angled slightly to allow wind to push it round (like a proper windmill - see final photos below).
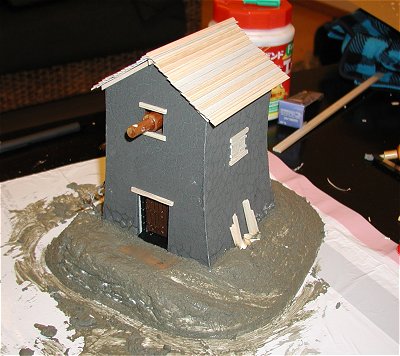
A pile of broken wooden planks and beams are another little details that will add to the realism - it's all in the details, I reckon! I added a thin spread of watery instant cement (no textured filler in Japan!) just by hand, or rather by plastic glove. That filled in any gaps and textured the ground.
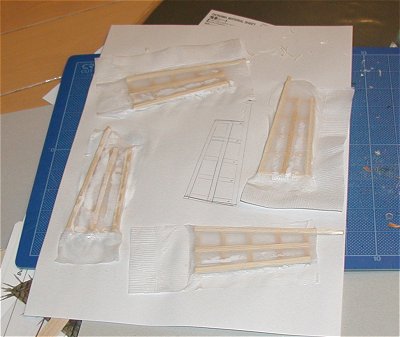
After reading some modelling guides and online sources, I watered down PVA glue (lots) and painted it on strips of paper napkins. These were then draped across the front of the wooden sails, and left to dry.
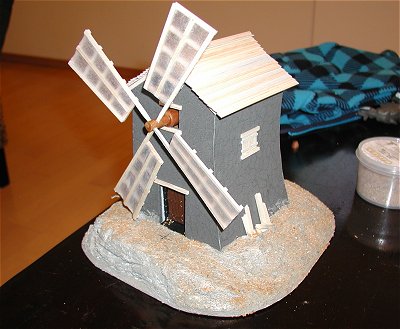
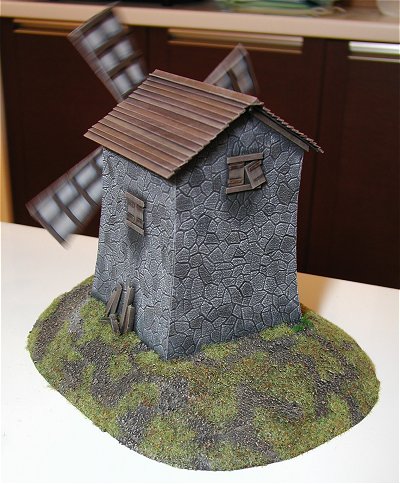
The sails go on. Then a final sprinkle of Citadel's modelling sand over the non-rocky bits, and it's ready for painting.
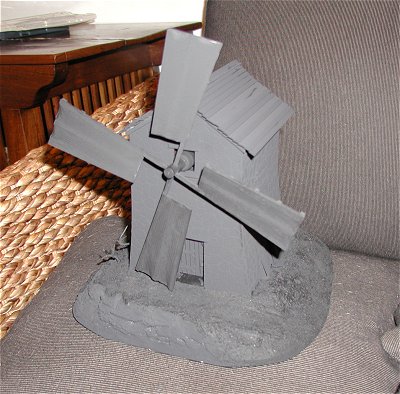
This black spray was a great find - only 90% black, so actually a dark grey, it's ideal for undercoating buildings. And of course it's matt, so better for drybrushing.
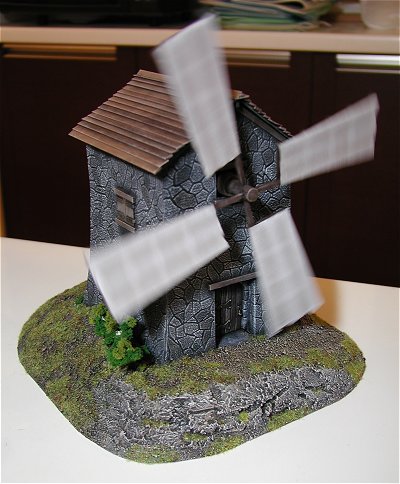
Careful drybrushing of every surface gave a great effect, but this time I tried using GW's washes randomly on the stonework, to add variety. The wood roofing was done in a variety of browns, while the shutters and broken woodpile were done in greyer browns, to suggest greater age. All the wood was then given a very faint drybrush with bleached bone to pick out the edges. Note the back shutter, with one hinge missing - some badab black wash gives us the outline of where the hinge should be, and gives a sense of great age to the building. The sails were done as Dheneb Stone and drybrushed with Skull White to mark the beams below an give some depth. The sails balance well, and a slight breeze from an open window (or bored gamers) will start them gently spinning. A cool addition to any table! |