


David デイビッド : Test of Honour Armies
by David on 2018-03-12 (Mon) 18:56PMFor the first scenario in the samurai game Test of Honour, you only need 6 models per side, so I started with just enough for people to try out the game. I finished painting and rebasing with about 10 minutes to spare before people arrived!
Oh, and everybody always asks where the bases came from.... they're laser-cut acrylic from Ebay store Aliceflux.
Hosokawa Clan:
The Hosokawa Clan lived and ruled from Kokura Castle here in Kitakyushu, so it seemed natural to paint up one of the forces as the "home team".
Clan colours are black and white, but I added a little dark green just to make it more interesting to paint. I'm not very good at painting black!
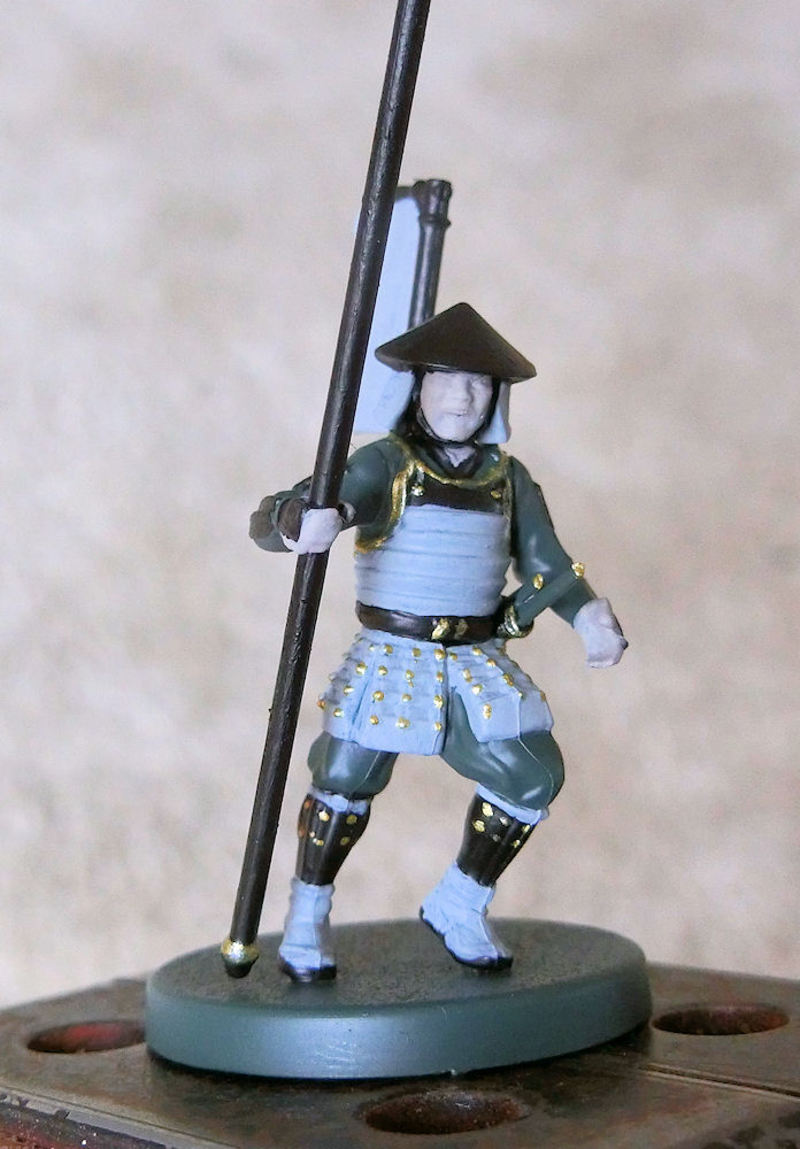
▲ I started by spraying with a matt dark green undercoat, then blocking in with light grey, black and gold. The skin, after a bit of experimentation, would be basecoated with Dheneb Stone.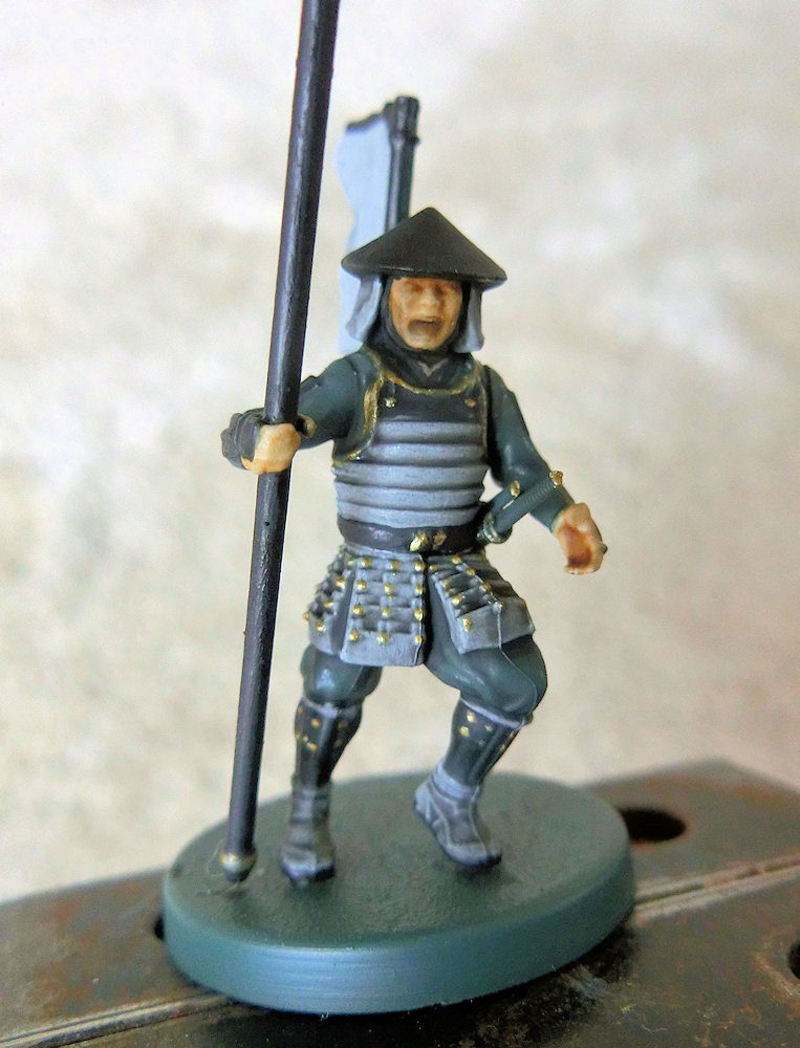
▲ A heavy wash of Nuln Oil over everywhere except skin areas, and then two washes of Gryphonne Sepia on the skin gave it enough definition. The sculpts are perhaps a little flat on detail, compared to GW figures, so the washes help.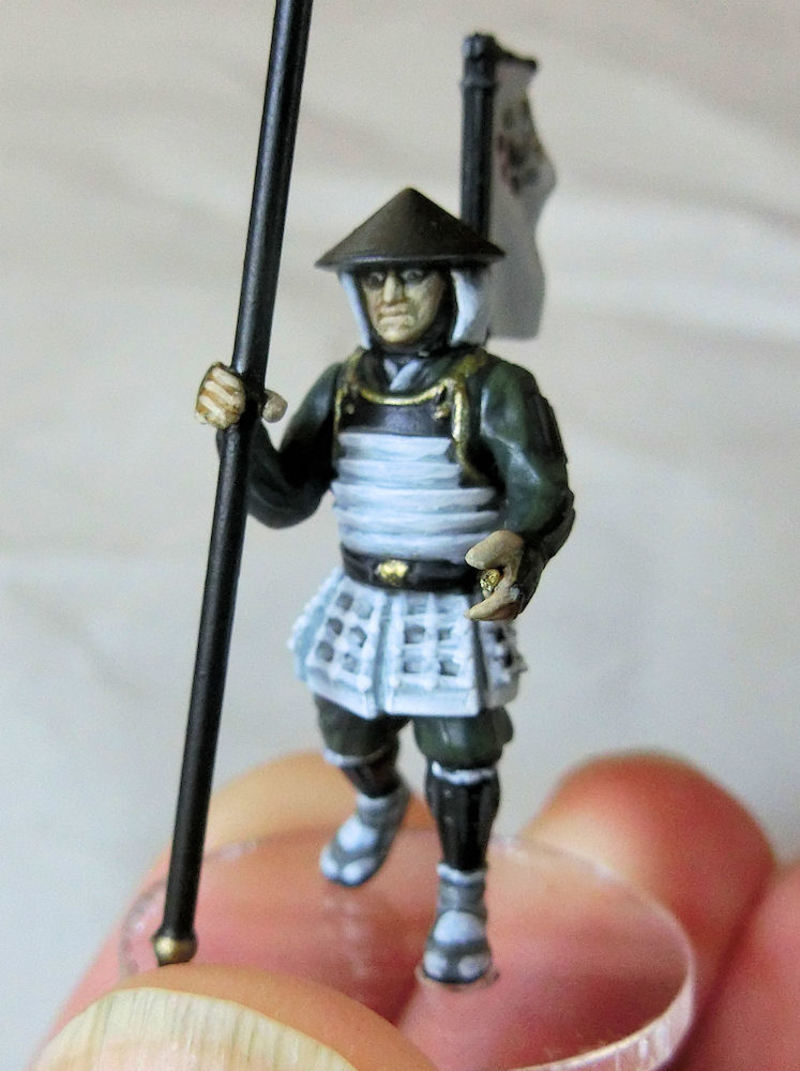
▲ Hmm, I seem to have taken a photo of the madly-staring guy!
I gently highlighted the green tunic and did some edge highlighting on the black armour, and then a flesh tone on the skin. The white was the hardest, and in the end I removed the gold studs/ties from the armour, as it just didn't work well. Instead, I settled for plain white armour plates.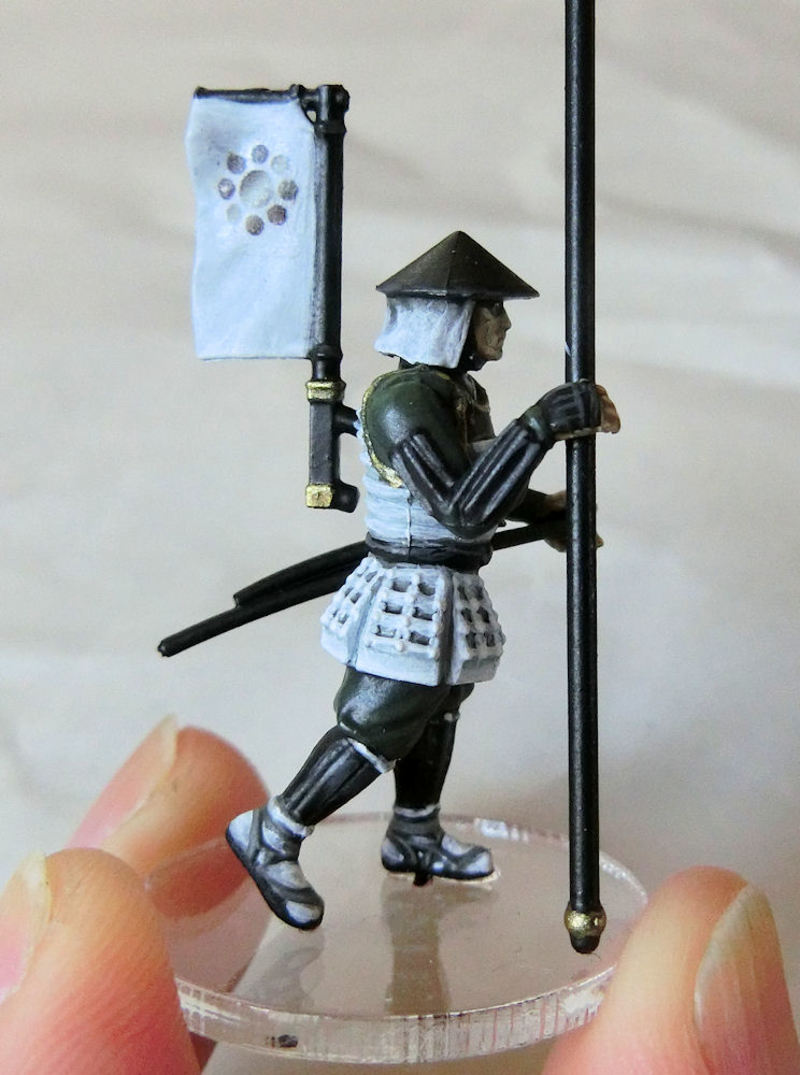
▲ For the test model, I hand painted the clan symbol on the banner. But painting circles is such a pain, so I decided to make some custom transfers and stick those on. So the pic above is the transfer version. Happily the highlights on the transfer design lined up perfectly with the folds on the banner sculpt.
I also decided to pull the finished models off their regular plastic bases and pin them carefully to clear acrylic bases (from Aliceflux on ebay). It was rather a hassle, but well worth it when you see them on the high-resolution battlemat we'll be playing on....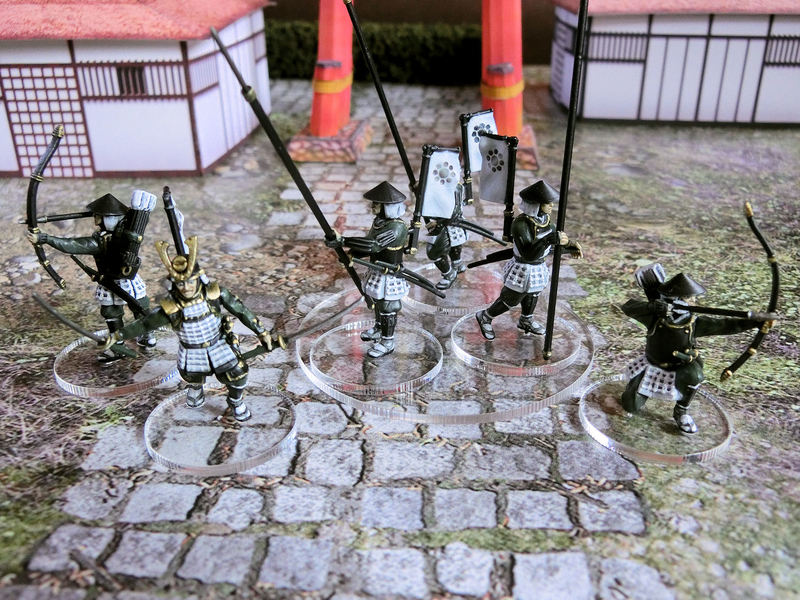
▲ Here's the 6-man Clan Hosokawa force. That samurai hero is modelled as a young Musashi, the famous swordsman. He actually lived at Kokura Castle for a time in the service of the Hosokawa Clan, and developed his famous two-sword technique. I lavished quite a bit of care on his face and armour, and his 5 (!) swords.
Mori Clan:
Mori Clan was a rival to Kokura's Hosokawa Clan, and were based in Hagi in Yamaguchi Prefecture. Some of that old town still exists, and is worth a day trip if you're in the area.
Their colour scheme is a very cool black and red.
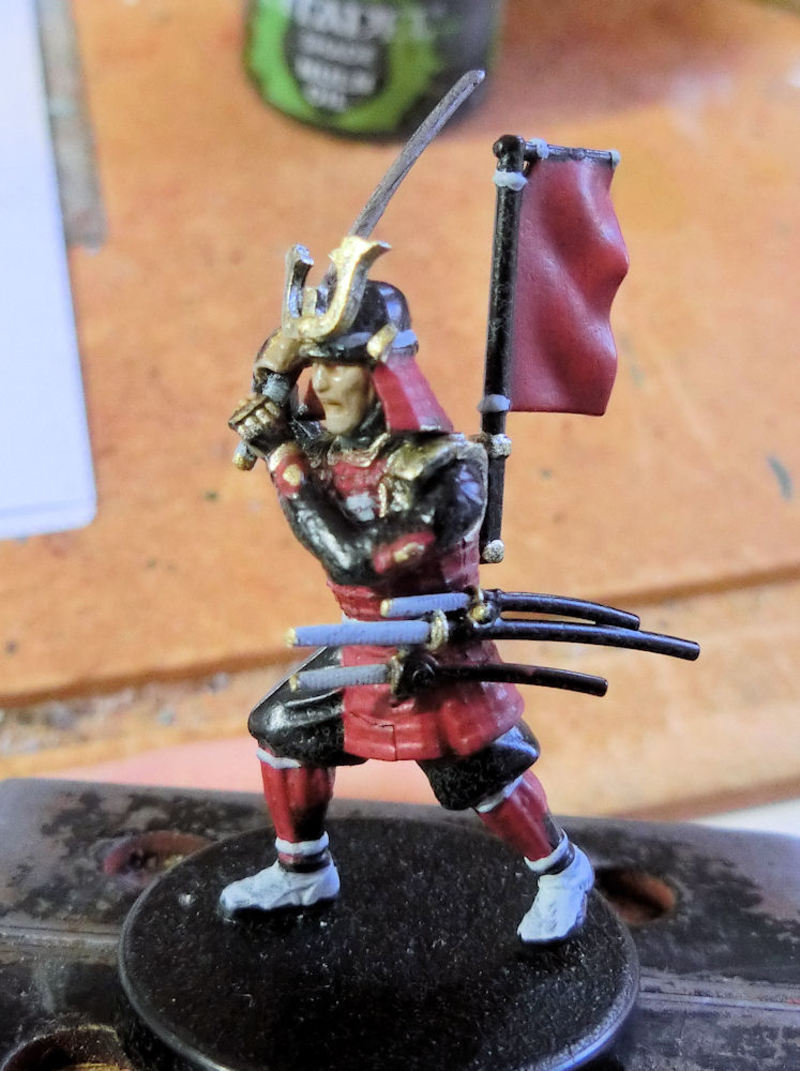
▲ Sorry, I forgot to take a photo of a regular spearman for this, so here's the young samurai hero instead. After a black undercoat, I painted big areas of Mechrite Red, gold and light grey. This hero's pretty blingy, yes?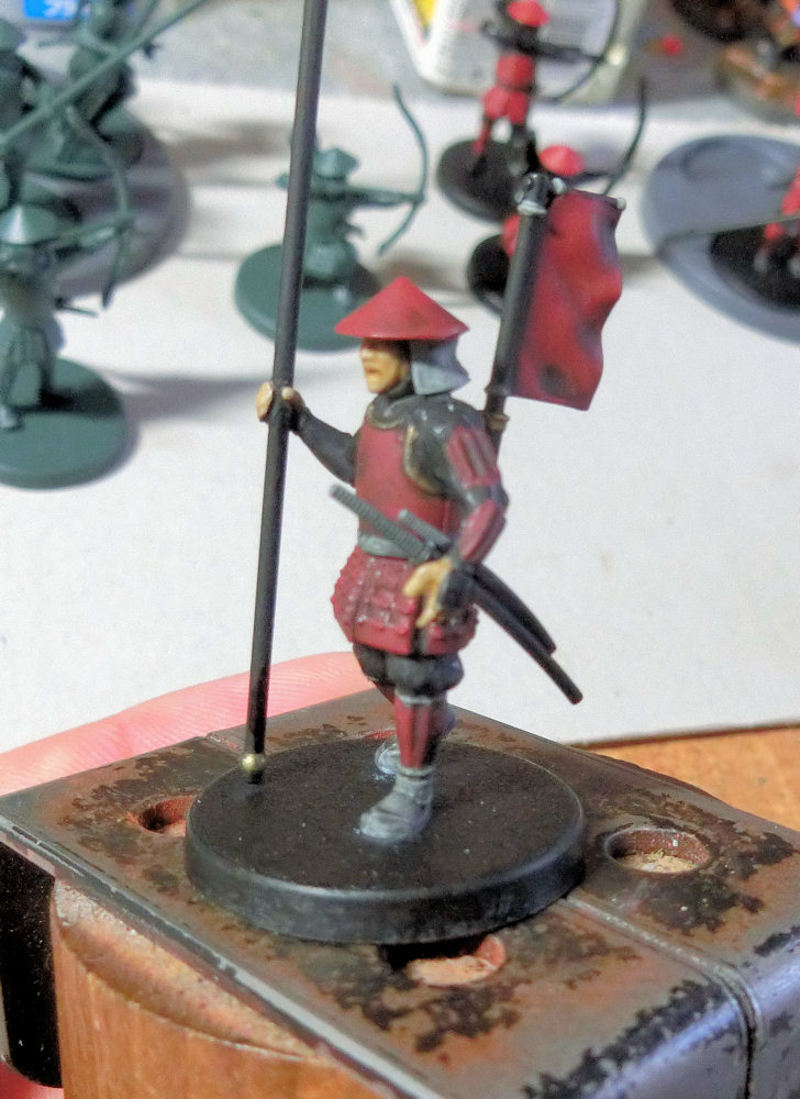
▲ Next step was to gives 2 washes of Sepia to the skin, and then a black wash everywhere else. It's certainly playable at this stage, but I was keen to highlight the red and skin.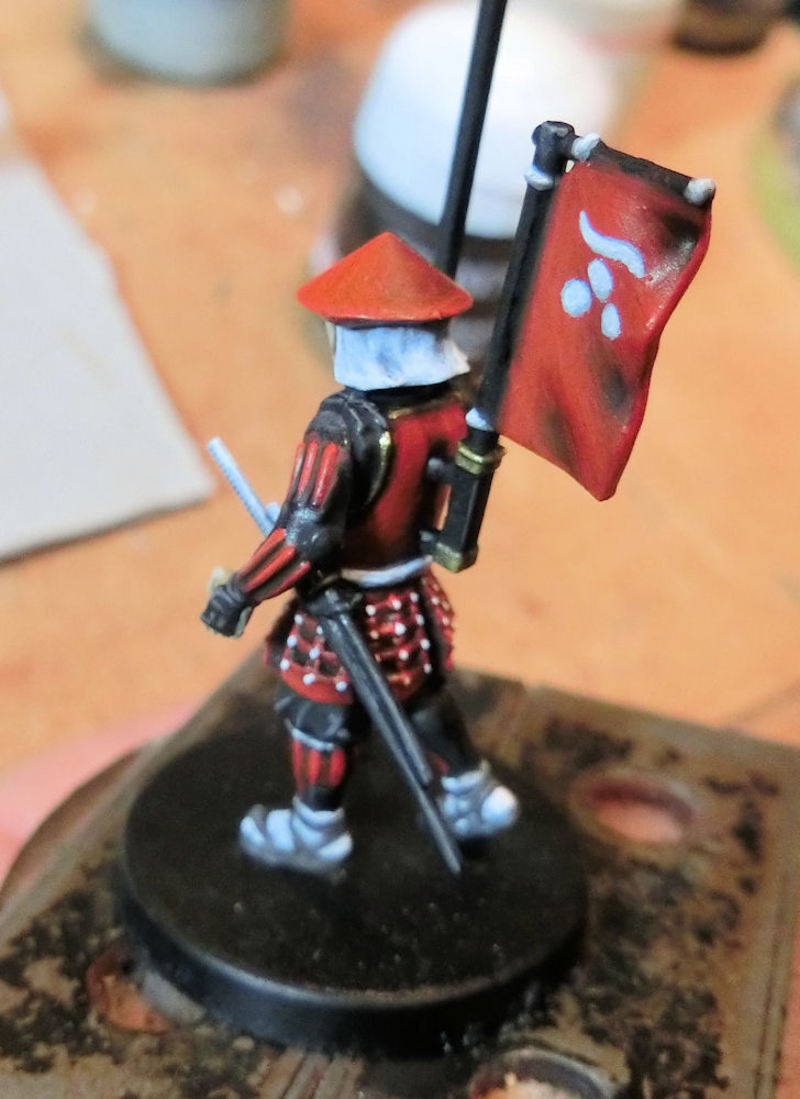
▲ Blood Red was used to highlight the armour, medium grey for edge highlighting the tunic, and pure white for the socks and hood. I decided to try white studs, as it's a good contrast to the red armour.
For this test model, I handpainted the clan symbol on the banner, but again I decided to print transfers for the other models. Unfortunately I can't create white transfers, so I made black ones and then used the shape as a guide to paint over in white. A bit of a pain, but easier than trying to hand paint the design from scratch each time.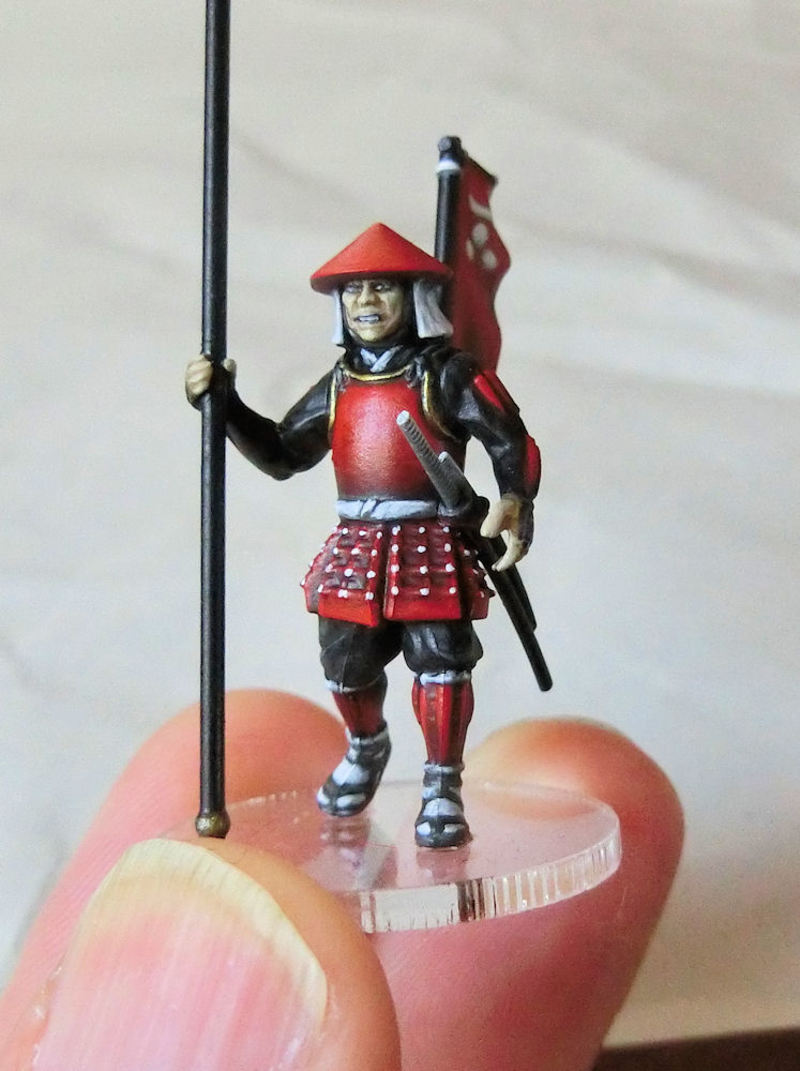
▲ The finished spearman. I quite enjoyed highlighting the red. The helmets have a good gradient highlight to the front, and look best from above!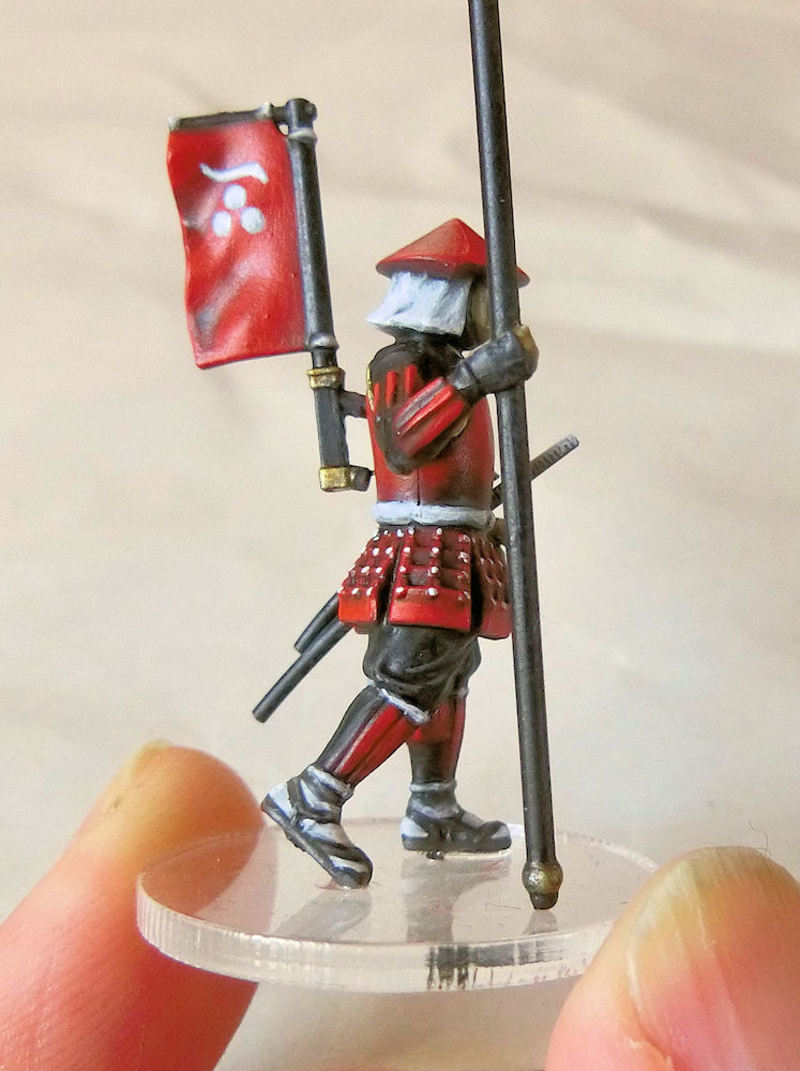
▲ To attach them to the clear bases, I drilled about 2mm into one foot and the base. Then a tiny drop of superglue on the end of 1mm brass rod and a firm push into the foot. Once that's dry, I used 2-part epoxy glue to glue the feet to the base (because superglue would fog up the clear acrylic and ruin it).
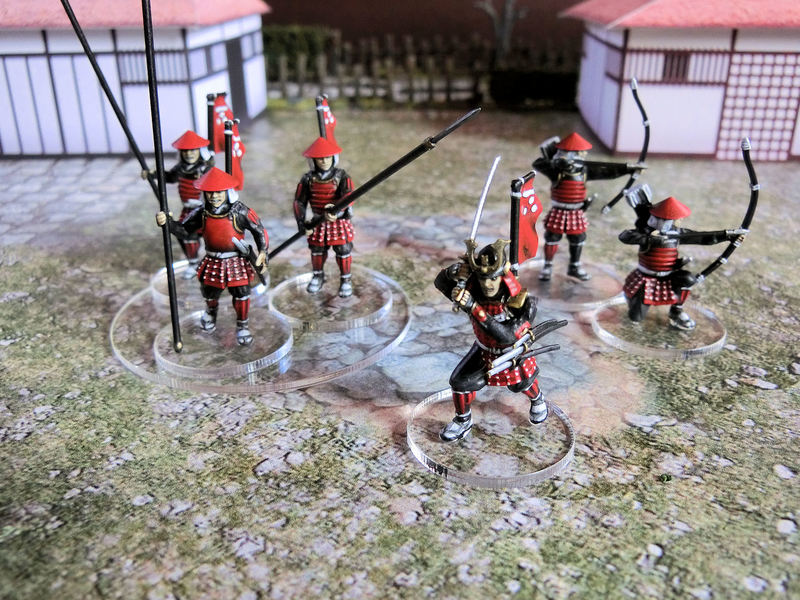
▲ The completed Mori Clan and their samurai hero. The red and black colour scheme is certainly eyecatching!
Ninja Clan:
Before I started on filling out the samurai forces a little more, I just couldn't resist painting a few of the wonderful ninja models from the Ninja Box Set (Warlord Games).
These are truly awesome models, much more energetic than the rather static spearmen and archers of the samurai models. They are metal models, and therefore don't need assembly, except one arm here and there. With a very quick drybrush giving great results, they are ideal for beginners too!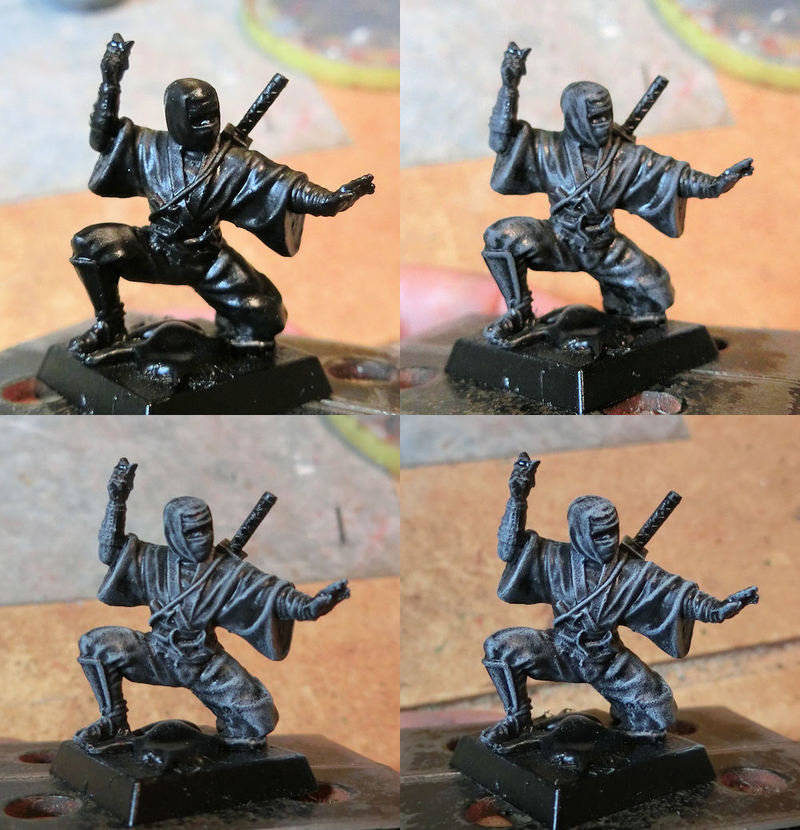
▲ I undercoated the models in matt black spray (pic #1), and then quickly but carefully drybrushed in medium grey (pic #2). I wanted to go lighter, so I then drybrushed on top of that with light grey (pic #3) and then a light drybrush in pure Skull White (pic #4).
After that, the model looked great, but the crevices of the tunic were a little too light, so I gave the whole model a heavy wash in Nuln Oil to bring it back to dark black while leaving the edges in light grey. Wonderful things, washes!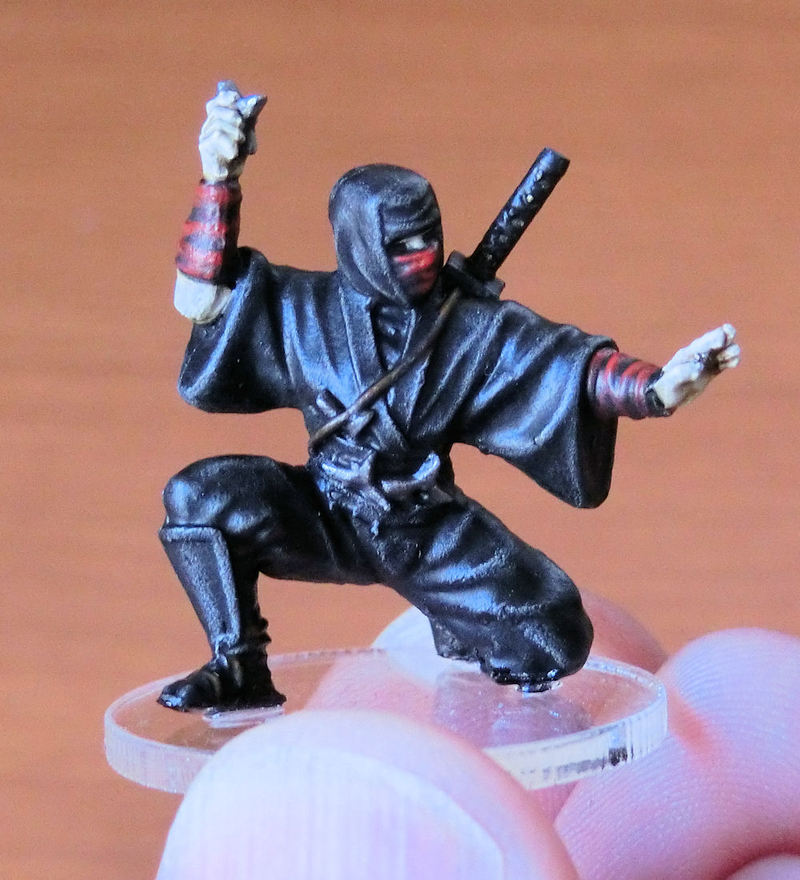
▲ Then a quick paint of the skin and weapons gave me an almost complete model, but I wanted to liven up the colour scheme a little so I painted the face mask and forearms with deep red highlights. I know it's probably not historically accurate, but I'm going with the "rule of cool"!.
Plus it gives me a good accent colour with which I can differentiate the character models. 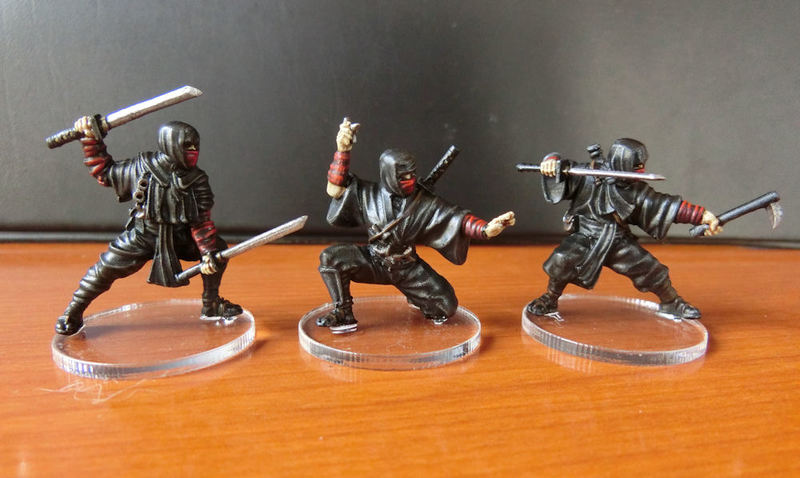
▲ So here are the first 3 ninjas, which I have to say are my favourite poses of the 7-model set. Again, I have mounted them on clear bases, as their rules allow them to climb rooftops and so on.
My new favourite models!
Travel Box
The small number of models for this game makes it a very handy game to carry around. You can fit pretty much everything in one box, plus a few buildings and maybe a small mat.
I fitted the inside of the box with rows of slots, made from cardbox cuttings. The models go in the rows, and then small strips of cardboard clamp them down so they don't bounce around.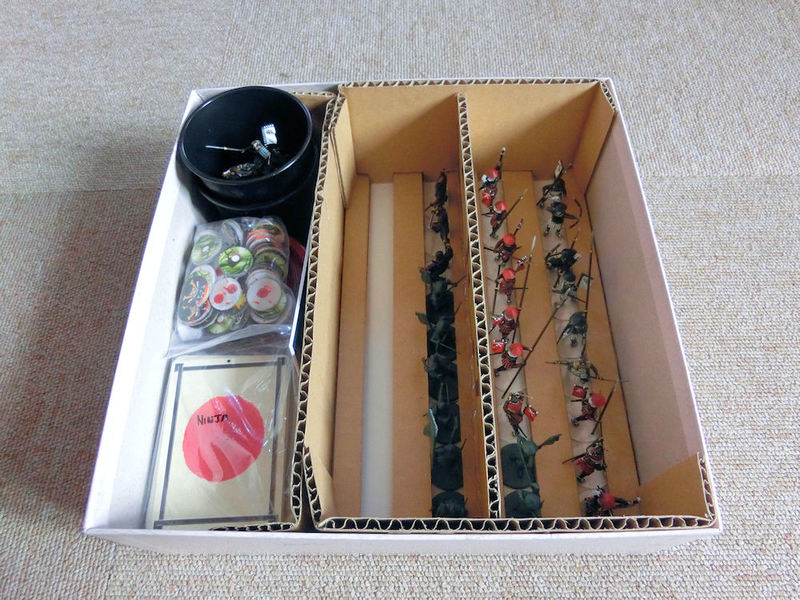
Those clamp strips then get secured in place by more cardboard brackets at each end, which are in turn secured in place by placing the lid of the box on top.
No breakages so far...
Mounted Samurai
For the 6 mounted samurai models, I wanted to change the colour scheme, so I chose blue and light brown, which is actually the colour scheme for Clan Asakura from near Kyoto, I think.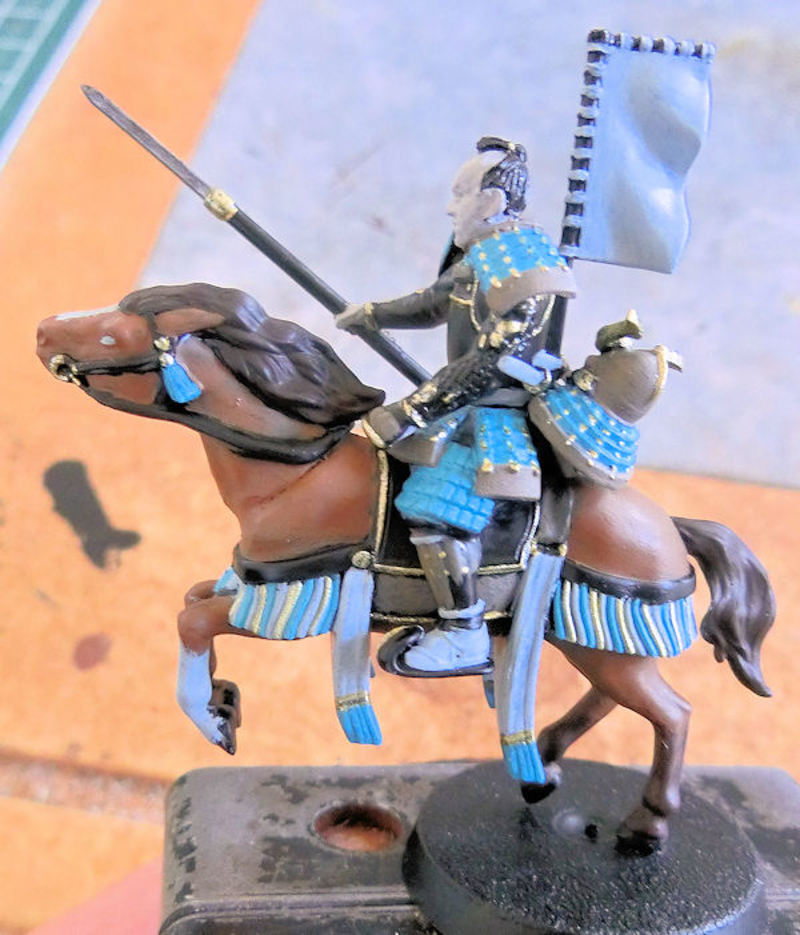
▲ Base colours are Temple Guard blue, Astronomican Grey (for the white areas) and Khemri Brown. I went a little mad on the decorations, and decided to paint each tassle separately!
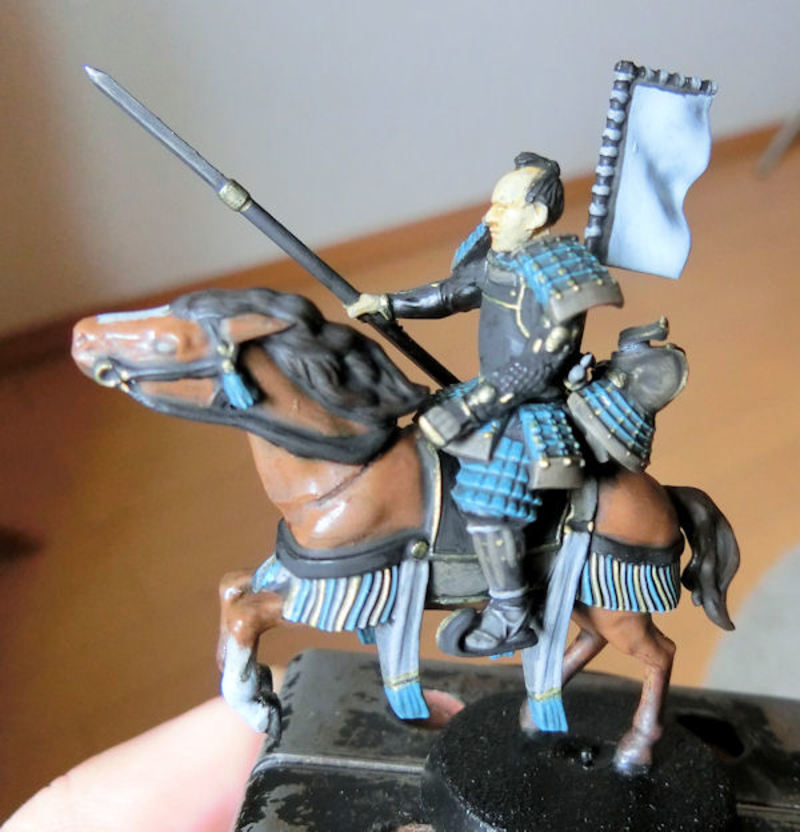
▲ It certainly looked a lot better after a heavy wash of Nuln Oil (black). The skin was washed twice in Sepia.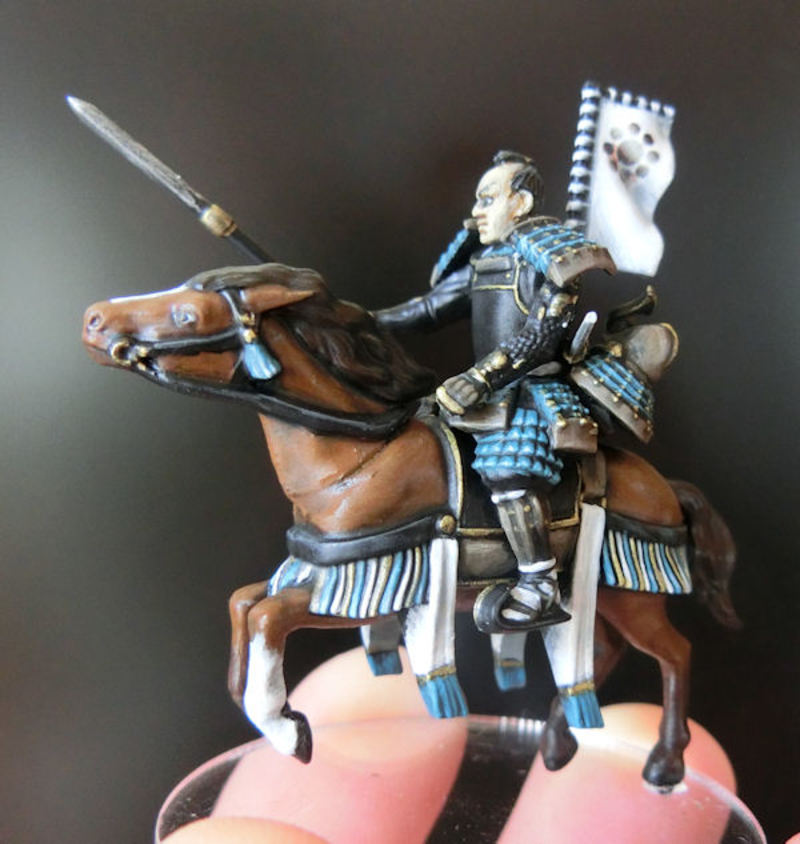
▲Here's the first of the mounted samurai, highlighted back up to light blue, white and light brown.
I decided to try and make the horse a little more interesting and realistic by adding a white sock to one foot and a white star to the forehead. The clan symbol was supposed to be a yellow design on the white banner, but after trying it out, it really wasn't very visible, so I just settled for using Clan Hosokawa black-on-white instead.
Finally, I mounted it on a large clear base, which looked great!
1 Comment :
Mark 2018-08-30 (Thu) 17:39PM
 A good job done! I'm a big fan of 'washes too! But' have been known to overdo it!!! 😊

コメントを書く :
Random Images: