

ロード・オブ・ザ・リング初心者向け塗装ガイド: Starter guide for Mines of Moria
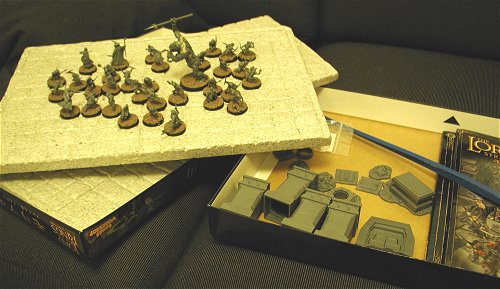
by David on 2010-02-12 (Fri) 12:27PMHere we have a freshly opened box of the Mines of Moria set for Lord of the Rings, which needs a quick paint before being loaned to our local stockist for display. This would also be used in future games at demo events, so it needed to be quick and simple, but effective enough to give the right atmosphere.
So over the course of about 2 weeks, roughly 2 hours each night was spent preparing and painting the terrain board, then the goblins, then the fellowship models. This is a quick account of how I did it.
近くにある「ステージ1」ショップのためにこのロード・オブ・ザ・リングのスターターボックスをペイントしました。毎日約2時間ぐらいで、たった2週間かかりました。塗装のペースが早かったですが、完成のモデルは結構よくなりました。やり方を案内します。
Board & Terrain
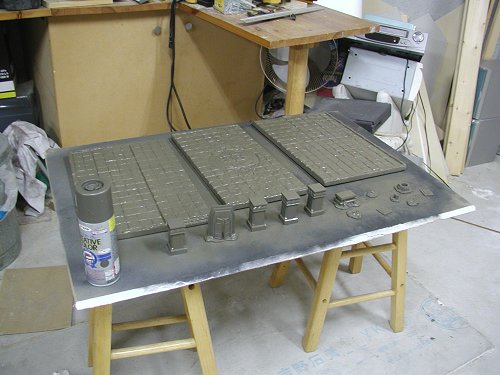
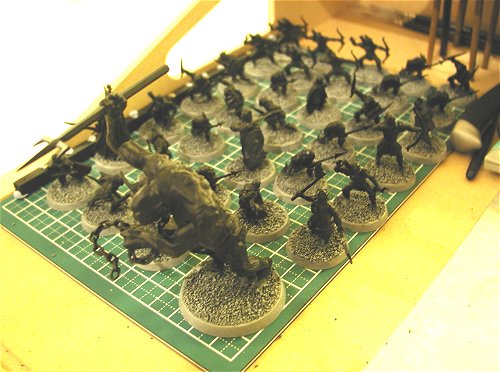
1. I happened to have an old textured Bloodbowl pitch lying around, which would make an excellent display board for the shop, so here's a photos of the assembled items ready for undercoating. All of the models have been glued into their bases, and a 50:50 mix of water and PVA glue painted onto the bases was follwed by a quick dip in a tub of modelling sand.
プラモデル用の接着剤を使って用意しました。収納で見つけた石柄のボードも塗装します。ディスプレイーボードにはちょうどいいサイズでした。フィギュアのベースには水と木材ボンドを混ぜて塗りました。そして細かい砂(モデリングサンド)に入れてみました。このステージはオプションですが、おすすめします。
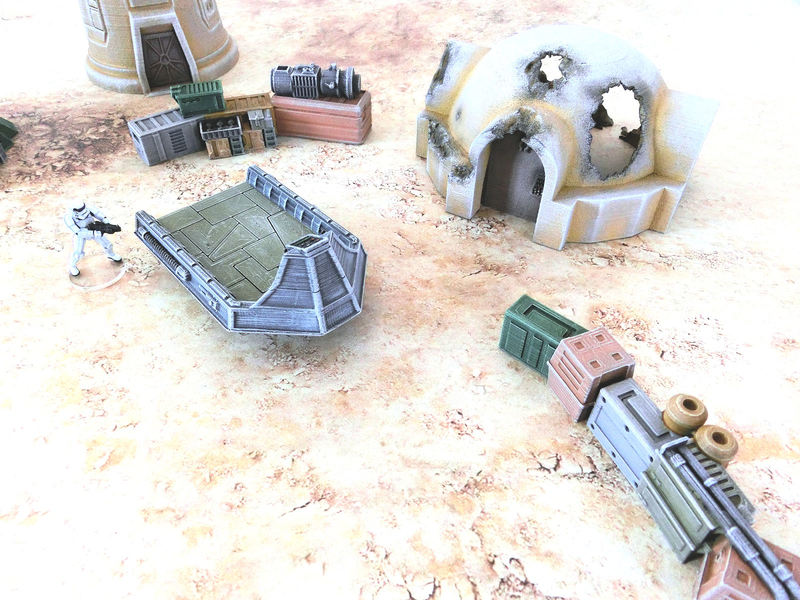
2. All terrain was undercoated with a medium-dark grey matt spray. Of course if you have polystyrene boards like the photo, you'll need to check that the spray is safe for them - or they will melt. Normally I would undercoat everything in black, but I wanted a slightly lighter feel for this demo board, so opted for grey. Having undercoated the boards and terrain, I found it still a little dark, so I sprayed a lighter medium grey over the top in patches too.
発砲スチロールを壊さないスプレーでアンダーコートをしました。ナフコで買った家具用のペイントでしたので、結構節約的なもんでした。縫ってから、ちょっと暗かったのでもう一度もっと薄いグレー色でスプレーしました。
3. Leave it to dry overnight. The photo below shows the second, lighter shade of grey I used, which I think looked a little better. The patchiness also added a bit of variation.
次の写真で二回目をスプレーした色を見えます。どうですかね?やはり、もっと薄いグレーがよかったですね。これでテレインはOKですが、後30分をかけてハイライトをしたかったんです。
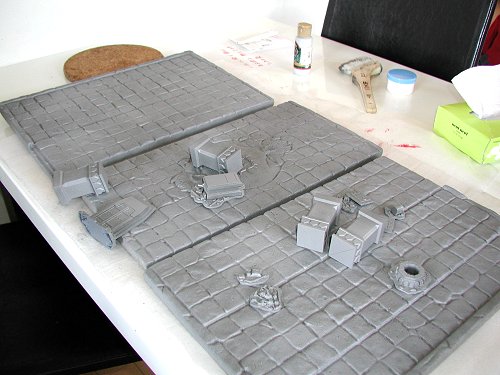
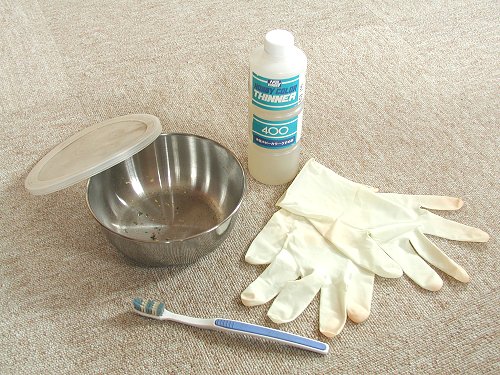
4. I used a cheap acrylic paint from a local DIY store and a very large brush to quickly drybrush all the boards and terrain. This really was done very roughly, but produced a good extra layer of interest.
グッデイで買ったアクリル製のペイントを早くドライブラッシしました。「磨き塗り」という方法ですが、すごくしやすいです。ペイントをブラッシに乗せて、それから拭いて = ほとんどのペンキをキッチンペーパーで取ります。そしてブラッシを軽くモデルに拭きます。
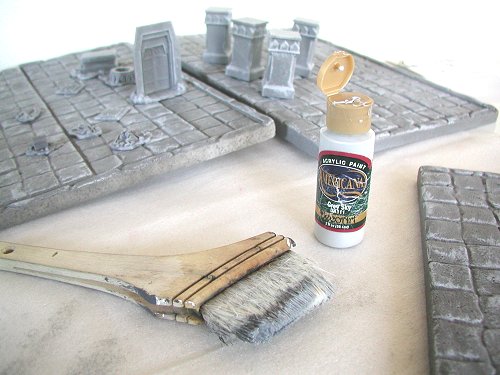
5. With the majority of the terrain finished, I quickly painted CALTHAN BROWN (foundation paint) over the wood areas, then CHAINMAIL over the metal areas of the doors, chests, hatches etc. The other terrain models (bits of armour, books, skeletons etc) I painted roughly in a variety of foundation paints. Then I washed all the painted areas in BADAB BLACK.
木材の部分をCALTHAN BROWNで縫った。メタルの所はCHAINMAILを早く塗りました。そして縫ったところはBADAB BLACKでウォッシュしました。それでテレインは完成になりました。
Moria Goblins
1. As I said before, all the models were given textured bases using glue and sand. Then they were quickly undercoated with a matt black spray. When dry, I use a half-inch brush to roughly drybrush the bases in a medium grey colour (I used some old wall paint I found lying around), and then again in a lighter grey acrylic (same one I used for the terrain). Finally, a neat paint of the side of the base, and they are ready for painting. I always do the bases first these days because A) it's boring, and I want to move on, and B) you risk getting mucky fingerprints on your paint jobs if you do it later.
ツヤケシの黒いスプレーをしました。1cm幅の筆でベースを二色のグレー(ミディアム、その後薄い)をドライブラッシしました。それからベースの周りをFORTRESS GREYでペイントしました。それで、ボードと大体同じグレーになりました。
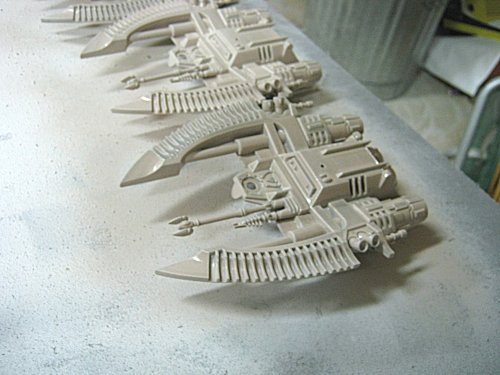
2. Goblins, ready for painting...
準備はOKですか?
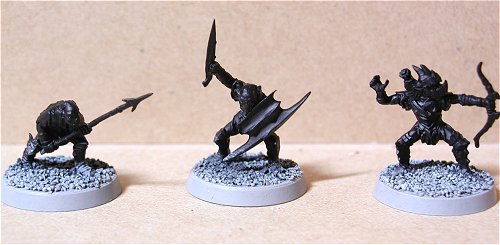
3. I drybrushed all metallic areas with CHAINMAIL with a fairly large and battered brush. Good to do this first, as subsequent coats of paint will hide the mess on other areas.
CHAINMAILでドライブラッシしました。これからの色で汚いところを隠せるので、丁寧にしなくてもOK。
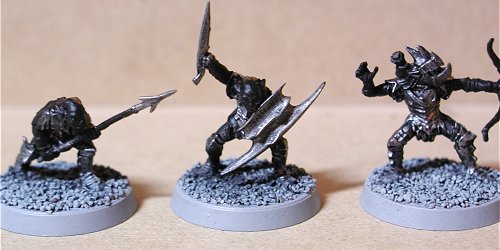
4. With a standard brush, I painted the cloth areas in MECHRITE RED. Not much to go now...
スタンダードブラッシでMECHRITE REDを布のところに塗りました。

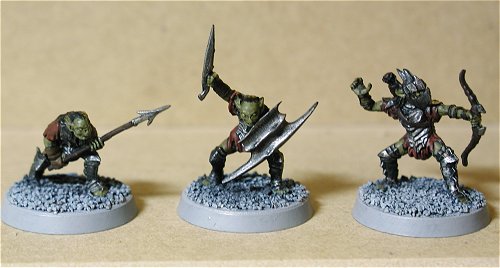
5. All wooden areas (bows, spear shafts etc) and leather straps were given a coat of SCORCHED BROWN, and skins area were then painted in GRETCHIN GREEN. The whole model was then liberally washed in DEVLAN MUD with a large brush. Once dry, the eyes were dabbed with yellow, and any teeth with DHENEB STONE. Love these foundation paints!
ベルトと矢などをSCORCHED BROWNで塗りました。皮のところはGRETCHIN GREENでペイントしました。そして全体的にDEVLAN MUDでウォッシュをしました。最後に目を黄色で、歯をDHENEB STONEを塗って、完成でした!
The Fellowship of the Ring
1. The last elements of the box set were the nine models making up the famous fellowship. The early stages were done in much the same way as the goblins, but I spent a little extra time highlighting clothes and skin. I painted all the models' areas in various foundation paints colours, including TALLARN FLESH for the hobbits' feet. I left the hands, faces and hair mostly unpainted (except dark brown hair for Aragorn, Boromir and Gimli) for now. However, I did do Gandalf's beard in ASTRONOMICAN GREY, because I know this works well with washes.
9人のモデルをファウンデーションペイントで塗りましたが、顔と手を縫っていませんでした。髪の毛もほとんど塗っていないが、暗い色のブラウン髪とGandalfのひげを塗りました。
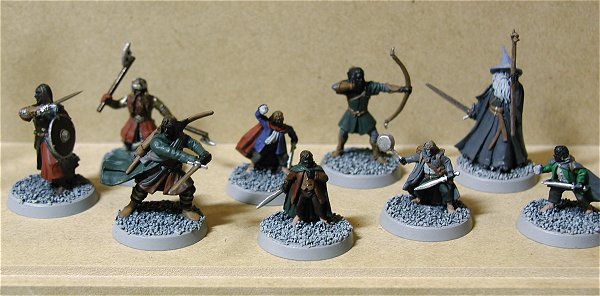
2. I applied a fairly heavy black wash with a large brush over all models with BADAB BLACK. The shiny effect would be removed later with varnishing.
BADAB BLACKで全員をウォッシュしました。乾いたらつやがちょっと出ましたが完成のモデルをツヤケシのクリアペンキでスプレーする予定でした。
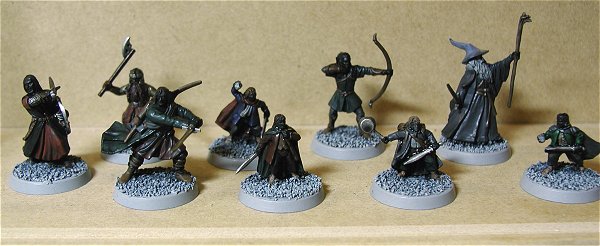
3. TALLARN FLESH was applied to all skin areas, and then the models would be ready for highlighting. You could, of course, use the models at this stage (if you paint Legolas' hair), but I had a couple days left in my schedule.
肌はTALLARN FLESHでペイントしました。このステージでも使えるかもしれないが、まだ2日間が残っていたので、ハイライトをしようと思っていました。
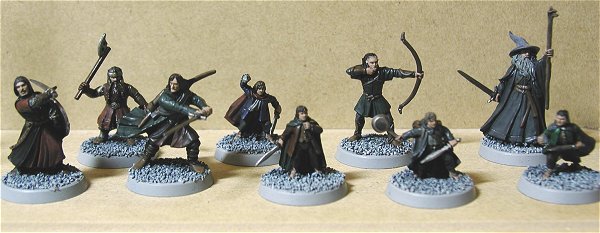
4. Final highlighting was done with lighter shades of each colour, and ELF FLESH was used for the majority of skin highlights. Legolas' skin needed to be a little fairer (to match the hair), so I used thin highlights of BLEACHED BONE too. The skin probably took the longest of all on these models, and making sure that the eyes weren't too goggley (but of course you can't see that in this photo)!
もっと薄い色でハイライトをしました。全員の肌もELF FLESHでハイライトをしました。最後には目を軽く点点で書くと完成でした。ペイントしたモデルはデモ用のイベントで使う予定ですので、守るためにARDCOAT VARNISHでスプレーをしました。

The set is now on display at the Stage 1 store in Moji, if anybody wants to take a look!