

Light Gaming Tables ゲームテーブル作成
by David on 2011-05-03 (Tue) 9:45AM
For our recent tournament we needed 6 solid gaming tables, strong and stable enough to take terrain, models and heavier modular boards. This was the cheapest method I could devise, and enabled the tables to be packed up again when finished into a fairly small space. The 'strong horse' legs can be detached from the H frame, and the H frame from the 6'x4' boards, and the legs can then be stacked easily. Total cost was approximately 5200yen ($50).
大会用のテーブルを作成したかったが、2つの条件はありました:安さと収納。DIY店の「グッデイ」で見つけたのはアメリカ製の「strong horse」金具でした。約5200円で作成できました。
What you will need:
- 1⅓ x MDF 6'x4' sheets. I used 5.5mm, which I think is the minimum thickness required. (approx 1300yen/$13)
- 4 pairs x strong horse brackets (600yen/$6 each)
- 7 x 2by4s. These are cheap wood beams, 2"x4"x6'. (1750yen/$17 total)
- Saw, electric drill with screwdriver and countersink bits, tape measure, pencil and screws (60mm x 8, 20mm x lots).
必要な材料:
- 1枚と3分の1枚のMDF合板 (1820mm x 910mm x 5.5mm)
- 「strong horse」の金具 x 4ペア
- ツー・バイ・フォー木材 x 7本 (38mm x 100mm x 1820mm)
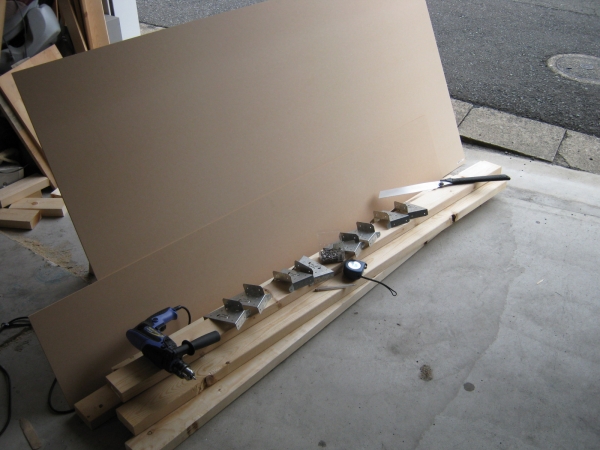
1. Cut the legs
Take 4 of the two-by-fours and cut them to make eight 800mm legs.
ツー・バイ・フォー4本を800mmで切って、テーブルの足を8本作成します。
This is what you should have after cutting the legs....

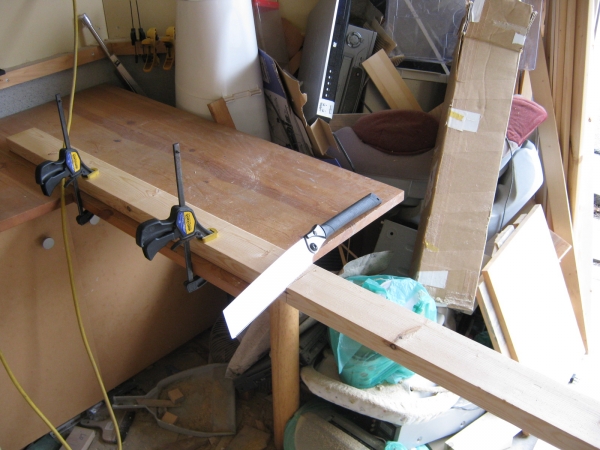
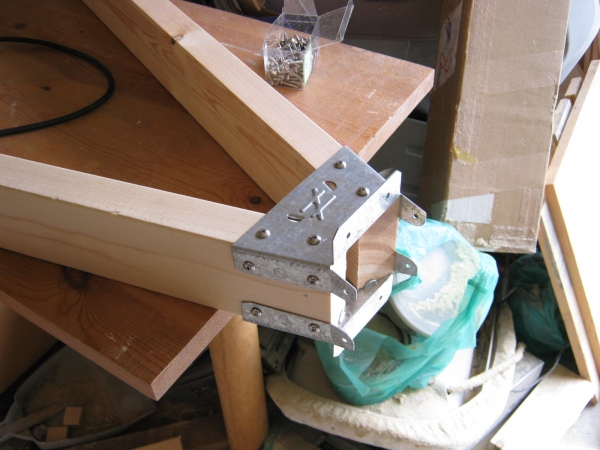
2. Attach the leg fittings
Take the first 2 of the legs, lay them out on a flat surface as in the picture below, and screw on the first of the strong horse brackets. You will need 8 screws for each bracket, so 16 screws for each leg. I recommend using the electric drill or impact driver to screw them in. I used fairly short screws - 16mm stainless, I think.
2本の800mm木材を金具で固定します。私が使ったのは16mmのステンレスのネジでした。
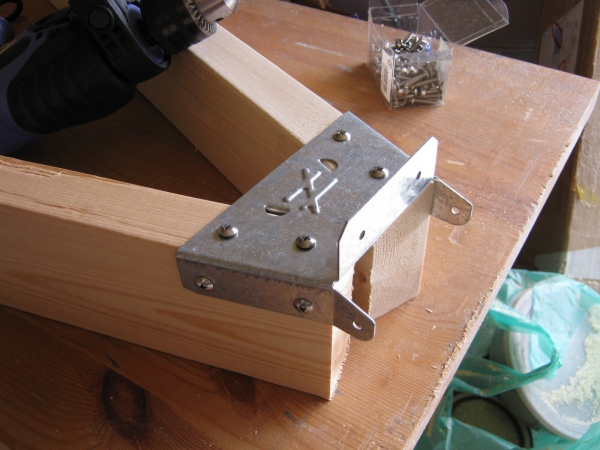
Then turn the leg over and do the other side with a second bracket.
足をひっくり返して、もう一つの金具をつけます。
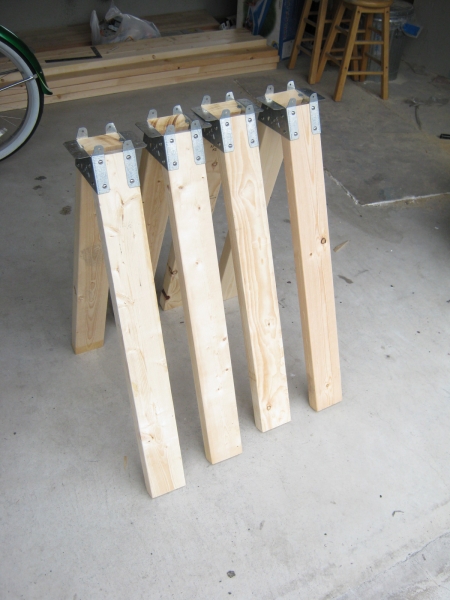
Your 4 completed legs should look like this...
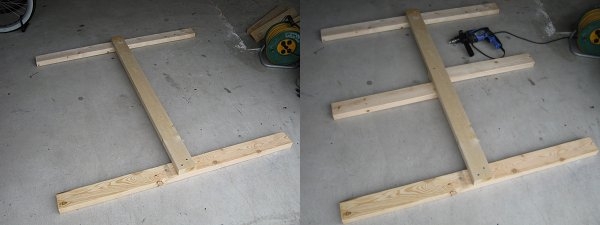
3. H frame
Take the remaining 3 two-by-fours and cut them to about 4 foot long. We were making standard size gaming tables (6'x4'), and with 5.5m MDF covering them they only needed to be supported for the middle four foot. Thinner MDF might bend at the ends. So I cut 2 lengths of 120mm and one length of 130mm. Lay the longer wood across the top of the other two at right angles (see photo below). Use two long screws (I used 57mm) at each join to secure them in place. I then used the leftover 600mm offcuts in the centre of the spine, and secured them as in the photo on the right.
残りのツー・バイ・フォーを使って、1200mm x 2本 1300mm x 1本 をカットします。57mmネジで固定します。
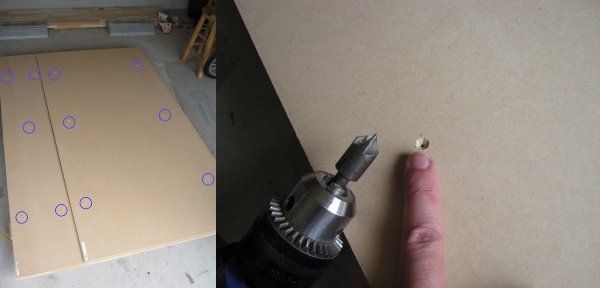
4. Tabletop
Lay the large and small MDF boards across the top of the H-frame. The smaller board should be about 300mm wide to make a standard-sized gaming table. Use the countersink bit on the drill (shown below right) to make a crater-shaped hole at each of the blue circles marked on the photo. That will allow the small screws to lie flat against the table top when complete. If you wanted to, you could paint the MDF boards green or grey to used as (very) basic wargaming tables. We were lucky enough to have mats and boards to lay on top.
ドリルを使って、MDF合板に小さい穴を開きます。
5. Construction
Your tables are now ready to be stored or assembled. Place out your 4 legs and lay the H frame across the top. Attach the legs to the frame with small screws (I used 20mm). That allows you to easily disassemble the table later. Then lay the boards across and attach with countersunk screws (I used 16mm). You're done!
完成です。これで収納に入れるか組み合わせる。足をHフレームに固定して、その上にMDF合板をつけます。

2 Comments :
Russ 2012-10-11 (Thu) 16:11PM
 How much do you think these weigh in kg?
Thanks

David 2012-10-11 (Thu) 16:28PM
About 7-8 kgs, I think. 1 kg for each of the four legs, 2 kg for the central ribs, and 1-2 kg for the top boards.
コメントを書く :
Random Images: