

How to make your own transfers 自作デカルの作り方
by David on 2012-10-05 (Fri) 21:29PMMy eldar were crying out for some unique runic designs, but I didn't want to try hand painting such intricate designs. So here is a quick guide how to make your own water transfer sheets in Japan...
エルダーのジェットバイクやタンクに自作のデザインを載せたかったんだけど、やはり怖いんだよね!そして、この転写デカルシートで方法を見つけました。
You will need : 必要な材料
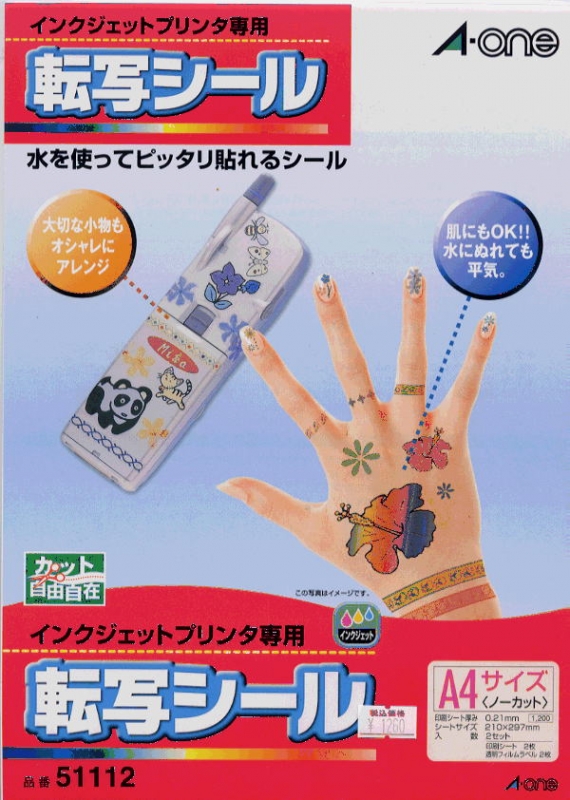
- Water transfer sheets for your printer (the splashproof ones I used were 1200 yen for 2 x A4 inkjet sheets, see below)
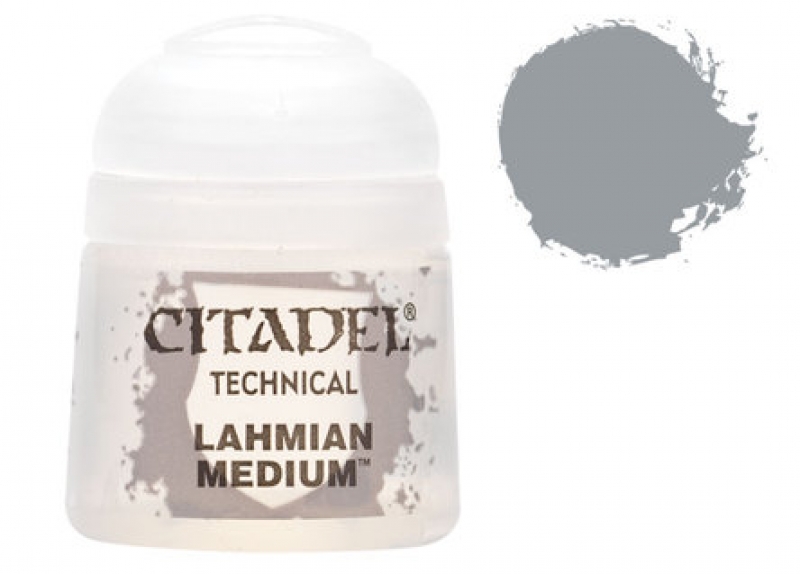
転写シール(私が使ったのはインクジェットプリンタ用のA4でした。1200円) - Games Workshop's Lahmian Medium (not essential, but recommended) - 400yen
GW製の「ラーミアン・メディウム」(無くてもOKですが、おすすめです)400円 - Brush ブラッシュ
- Water 水
 |
 |
STEP 1 - Prepare your design デザインの作成
I used a free downloadable font of Eldar runic script, which I simply typed into my computer and resized until I had the right size. Easy, eh? My jetbikes are white, so I chose to print my design in light grey. Test print a few times.
インターネットからエルダーフォントを無料でダウンロードしました。そして、ワープロソフトでテキストを入力して、何回もテストの為に印刷しました。
STEP 2 - Print on transfer paper 転写シートで印刷する
日本語の印刷方法は下に書いています。重要なポイントは「左右反転」で印刷する事です。
For you English speakers, the instructions for printing are fairly simple. To print the final transfer sheet, you must make sure your design is reversed. Most modern printers allow you to do this fairly easily - the Japanese is usually "左右反転". So once you are sure it will be reversed, print onto the white sheet, and allow to dry. Don't touch the sheet or it will smudge.
Then peel off the blue backing from the glue sheet, and carefully smooth it over the printed side of the design sheet. Then, press firmly - I recommend a ruler to do this. Leave it for a while.
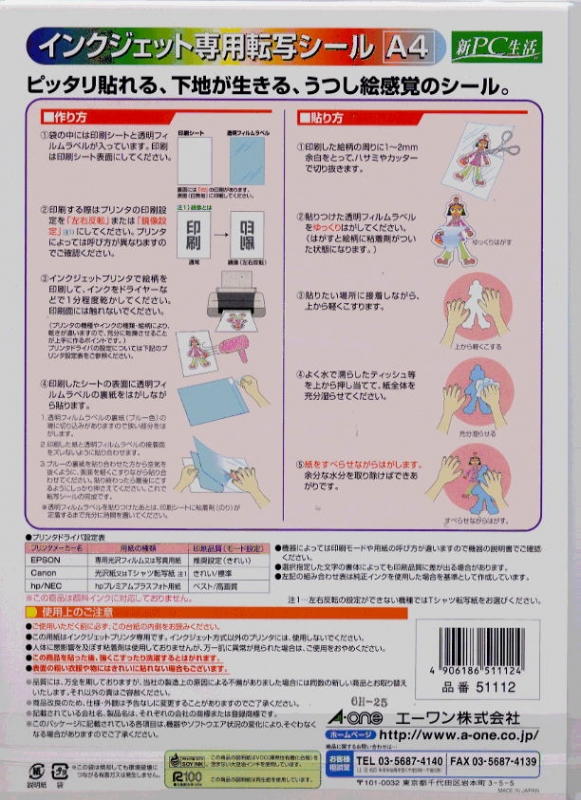
STEP 3 - Adding the transfer to your model ミニチュアに貼ります
また、このステップの説明が上の写真に書いています。
Cut each transfer from the sheet, leaving 1-2mm around your designs. Slowly peel off clear film label, and you should find that your design has now been transferred (and reversed again) on the glue sheet. Place it glue-side-down on your model and gently push the back. Then put a couple of drops of water on the back of the white backing paper and make sure it soaks every part. After a few seconds you should be able to gently slide the backing paper off, leaving your transfer stuck to your model. Leave it to dry.
STEP 4 - Aftercare アフターケア
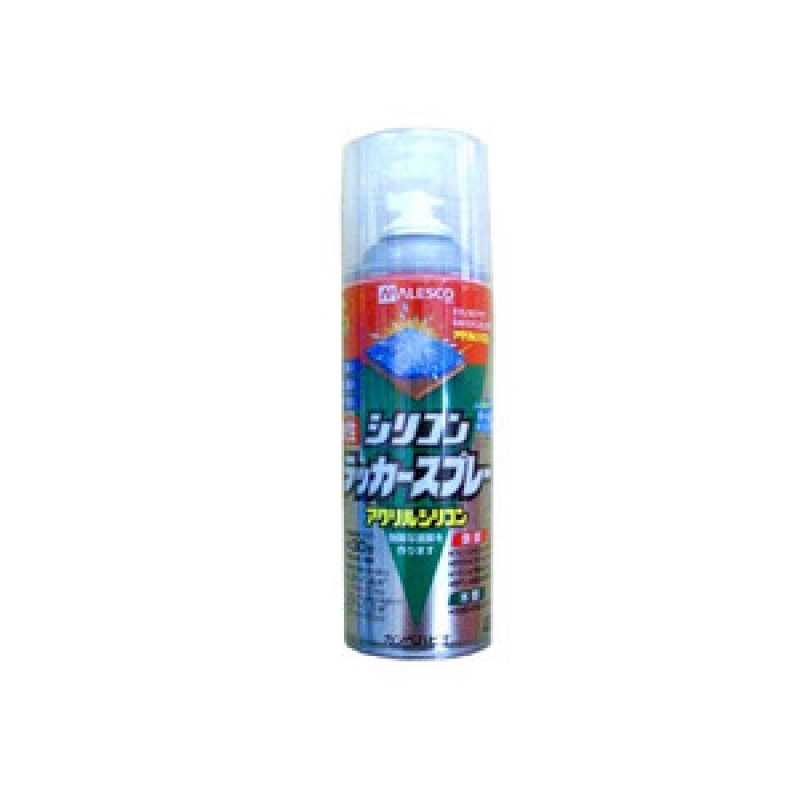
It's worth protecting your new transfers once they have dried, and I made a few experiments to find the right combination. I strongly recommend brushing a thin coat of Lahmian Medium over the transfer, to help it adhere properly. It also helps hug any bumps a little better. Once that is dry, you can spray the model with the clear-spray of your choice (I used the Alesco matt clear spray below), and you won't even be able to see the joins of the transfer. Perfect!
モデル上のデカルが完全に乾いたら、強化する為にラーミアン・メディウムを塗ります。その後、普通どおりに透明スプレーで塗れます。
 |
 |
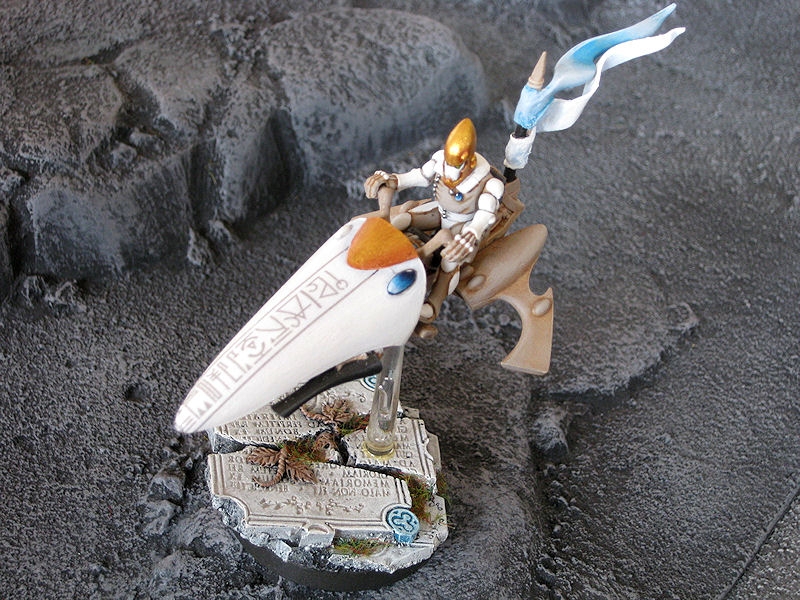
Here's a finished example:
2 Comments :
Vlad 2012-10-06 (Sat) 22:10PM
 Thanks for the great tutorial! Will try it out on some space ships sometime soon.
About the clear spray - I've had very bad experiences in Japan with both the GW and Army Builder versions, as they both left a semi-transparent white layer instead of a fully transparent layer on the miniatures. I believe it's due to the humidity, as I never had the problem in Europe. Recently I am using Vallejo's Matt Varnish on all my models, but using a spray again would save me a lot of time.
Did you have any similar problems, and what are your general impressions of the Alesco one?

David 2012-10-09 (Tue) 11:47AM
I've never had problems, but maybe doing it outside makes the difference? Alesco spray is not quite perfect matt, but somewhere between matt and satin. Suits most models quite well, and seems quite hard-wearing.
コメントを書く :
Random Images: