High Elf Port Board : ハイエルフの港ボード PART 7 Finished!
by David on 2013-11-28 (Thu) 10:35AM<< High Elf Port Board : ハイエルフの港ボード PART 6
The port board is missing its centrepiece... so I wanted to build a small elven mansion to fit in the centre of the raised area. In shape and style it had to match the lighthouse, and I really wanted to add in a raised walkway too. The obvious solution was to have two buildings linked, so I chose a large upturned beerglass as the 'tower' part, and chose to scratchbuild the main building from card and foam.
ボードがもうそろそろ完成だけど、真ん中に大きい建物を作りたかった。二つの建物を作って、その間に階段か橋を置けるかなと思った。

Here was the initial mockup to check I had the size and layout roughly correct. The very stylish steps are a plaster scenery item from German maker Thomarillon.
まずはカードで一応の形をチェック!階段は「Thomarillon」と言うドイツメーカーから購入しました。
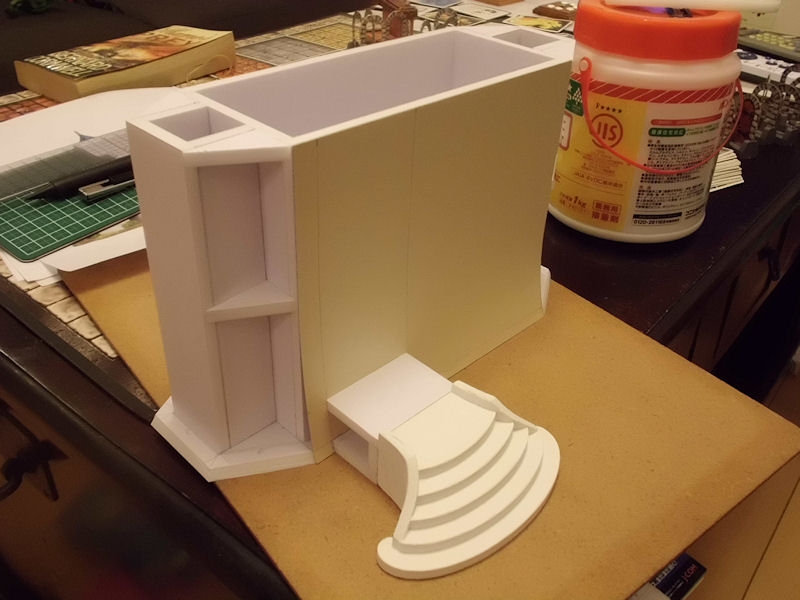
Foamcard for the base and main structure walls give a very tall, slim outline. On top of that I carefully glued thick card to give it a distinctive curved shape, bending out towards the bottom. I'll admit that this step was a real pain, as getting the edges of each panel to match up without gaps was mostly trial-and-error.
フォームカードでベースと壁の形を作りました。その上にちょっと曲がっているカードを貼りました。結構時間かかりました!
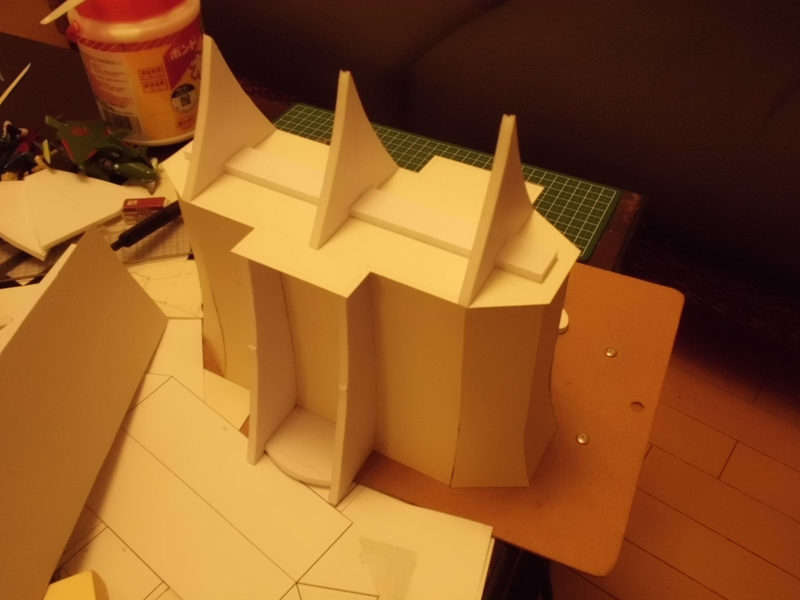
With the basic walls complete, I added some buttresses on both sides. The buttresses on the back (shown above) were centered in the middle of the wall, and would eventually become a small balcony with an ornamental bench alcove beneath it. Sufficiently elfy, I think! The front wall needed similar buttresses to help blend the steps into the building shape. With that done, I started planning out the roof, which would also be curved to fit the elven aesthetic.
上記の写真は建物の後ろです。バルコニーを作りたかったので、その下にエルフっぽいベンチも置きたかった。瓦の形もエルフらしいカーブに決めました。
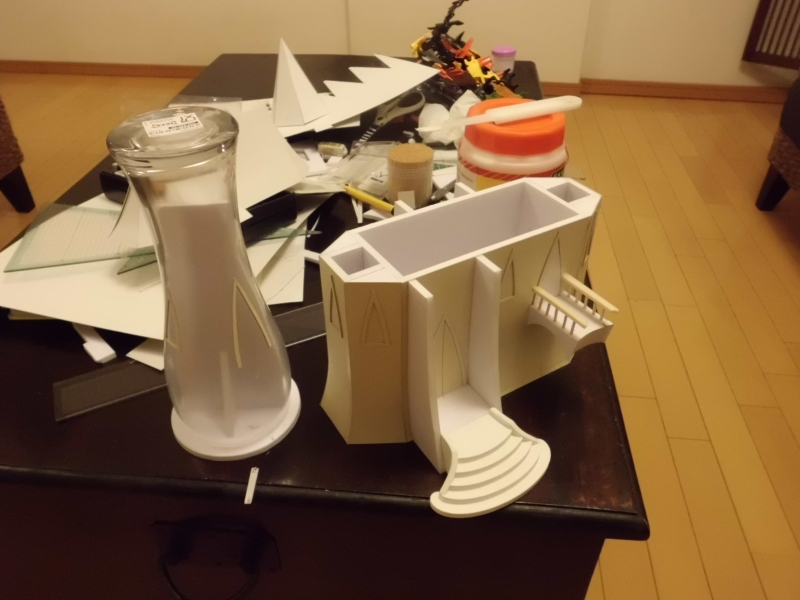
I moved on to final design elements - doors, windows, and the connecting walkway. These were simple double-thickness strips of card for frames, because I wanted to use my old favourite, plastic plantpot mesh, for making diamond window panes. The walkway and balcony rails both used the tops of decorative toothpicks from the local 100-yen store.
100円ショップで買ったガーデニング用メッシュを窓に使うつもりでしたので、窓サッシュはカードでできています。橋のハンドレールはつまようじと木材でできています。
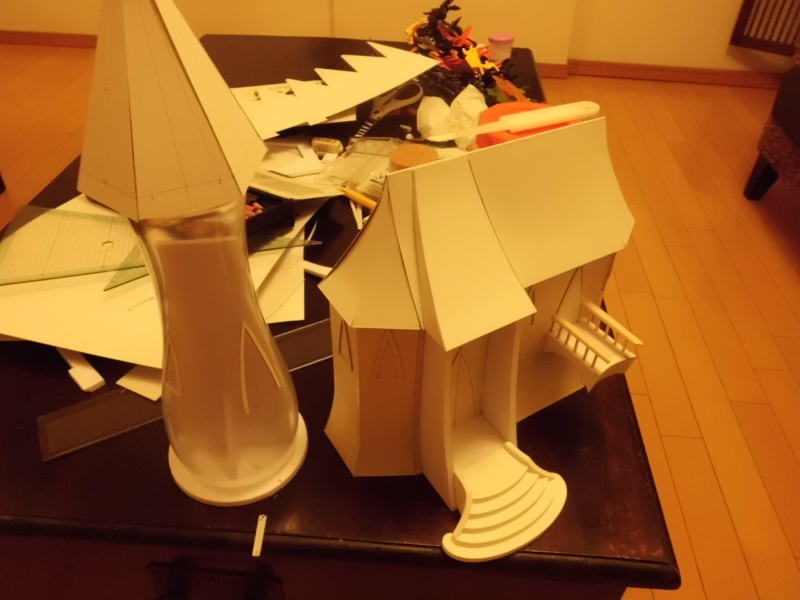
With the basic roof shapes done for both the main building and the circular tower, all I had left to do was cover the rooves in spiked strips of roof tiles. After my hassles with the cone-shaped lighthouse roof, I decided to stick with a hexagonal, non-curving roof for the tower.
瓦の三角形を貼れば、大体完成でしたね。あとはペイントだけです。。。
On to the painting, and then we were done. Drum roll, please......
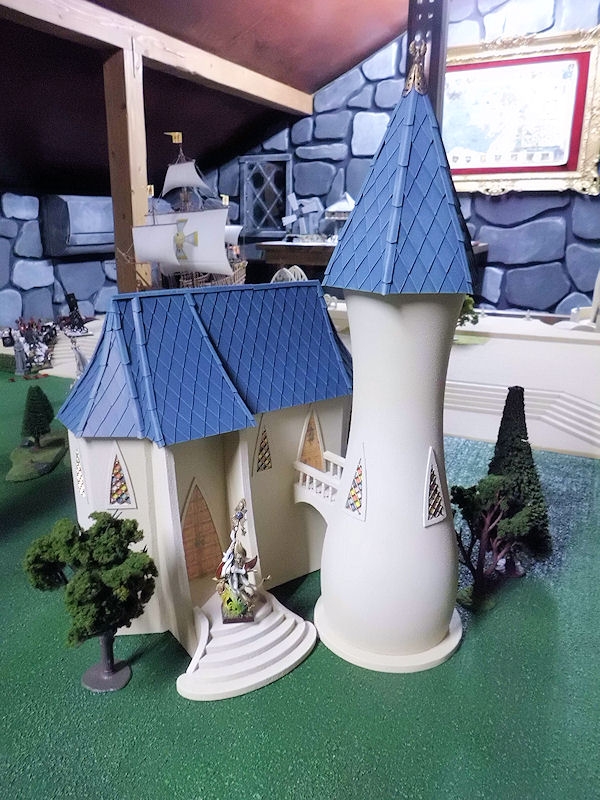
I used the same wonderful textured stone spray as for the lighthouse, painted in creams and whites. The roof used the same blue-grey colours with very light drybrushing in ice blue.
ライトハウスと同じ色でペイントをしました。凸凹スプレーの後にクリーム色と白で軽くドライブラッシュ。
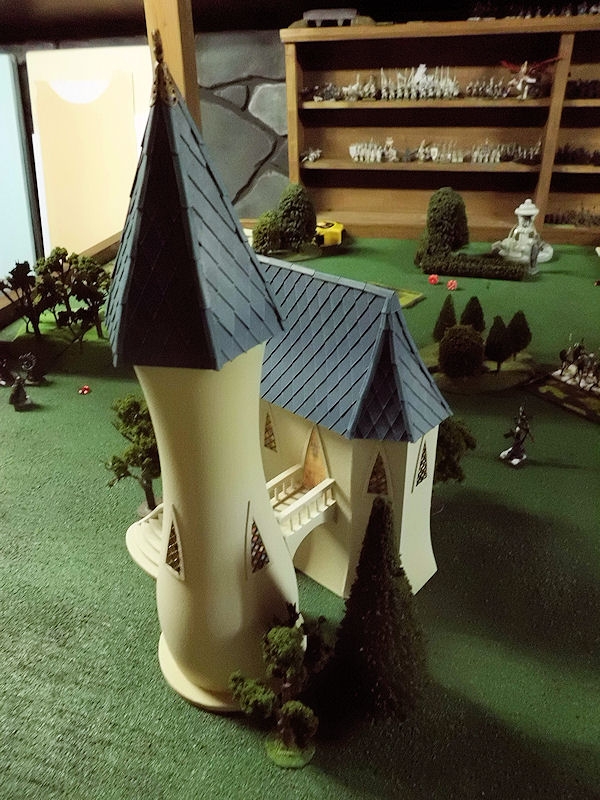
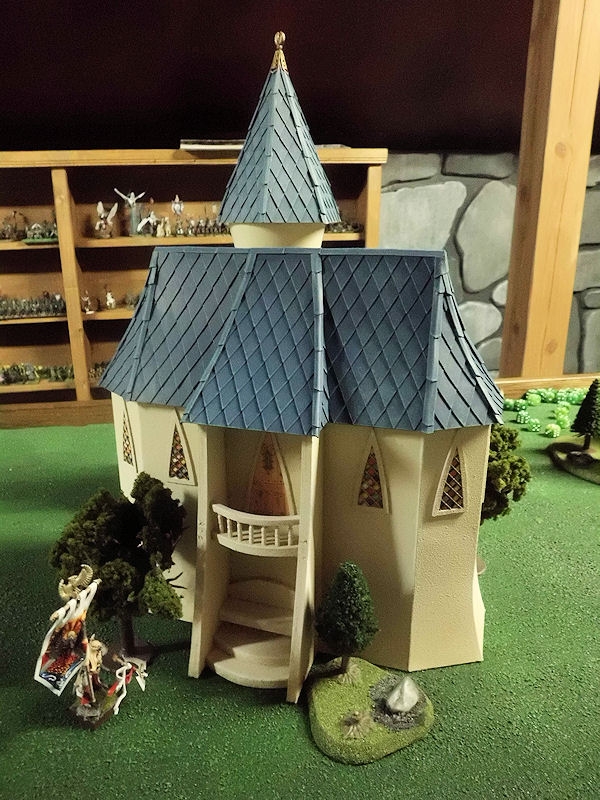
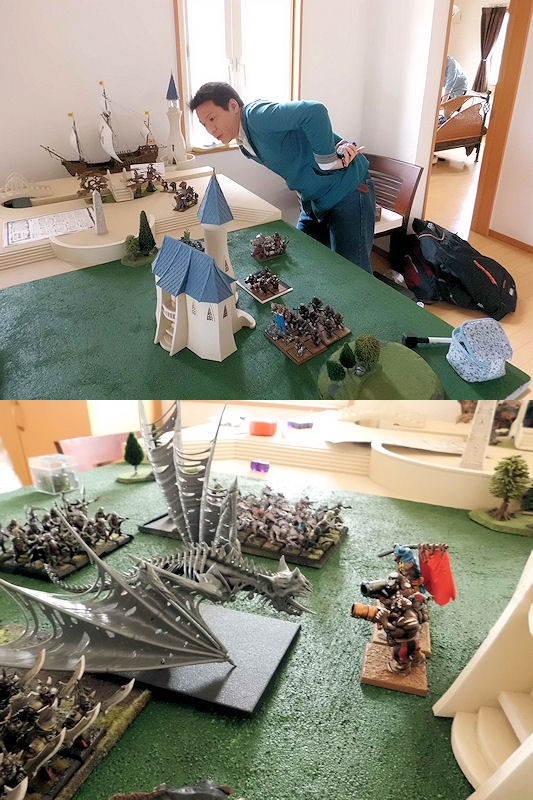
Probably my favourite bit is this rear balcony. For our first game on this completed board, we extended the port out into some ornamental gardens, which those poncy high-elves would no doubt admire every morning from their high vantage point. Idyllic, if it wasn't for the dark elf invaders!
1 Comment :
世良 2013-12-05 (Thu) 17:12PM
 相変わらずの造形美、手際の良さにに驚かせられます(^^)

Write a comment :
Random Images:


